

Before and After: This Bedroom Redo Is Made Up of Tons of Smart DIYs Starting at $30

Sometimes, when you look at a room that’s in need of major updating, it can be overwhelming and hard to envision when it’s finished. But some of the best advice — and some ofthe best redos featured on Apartment Therapy— includestaking things one step at a time, or in the case of room transformations,一个DIY project at a time.
In the words of DIYer Michelle McRae (@shellychicboutique): “You can do it! Just do one small project at a time. Give yourself grace.” Her bedroom redo is a great example of how a bunch of small projects can total one big transformation. Michelle changed the flooring, installed a board-and-batten accent wall, built custom nightstands, overhauled the closet, and created her own decor.
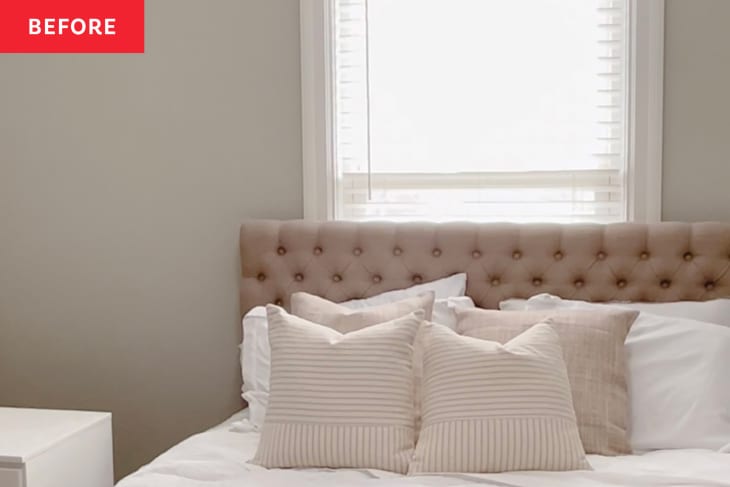
“The before was bland and boring — a lot of gray,” Michelle says. “It was just very vanilla. I wanted to love my bedroom. I spend so much time refinishing furniture for other people, I wanted to do something for me, something that cost very little but would have a huge impact.”
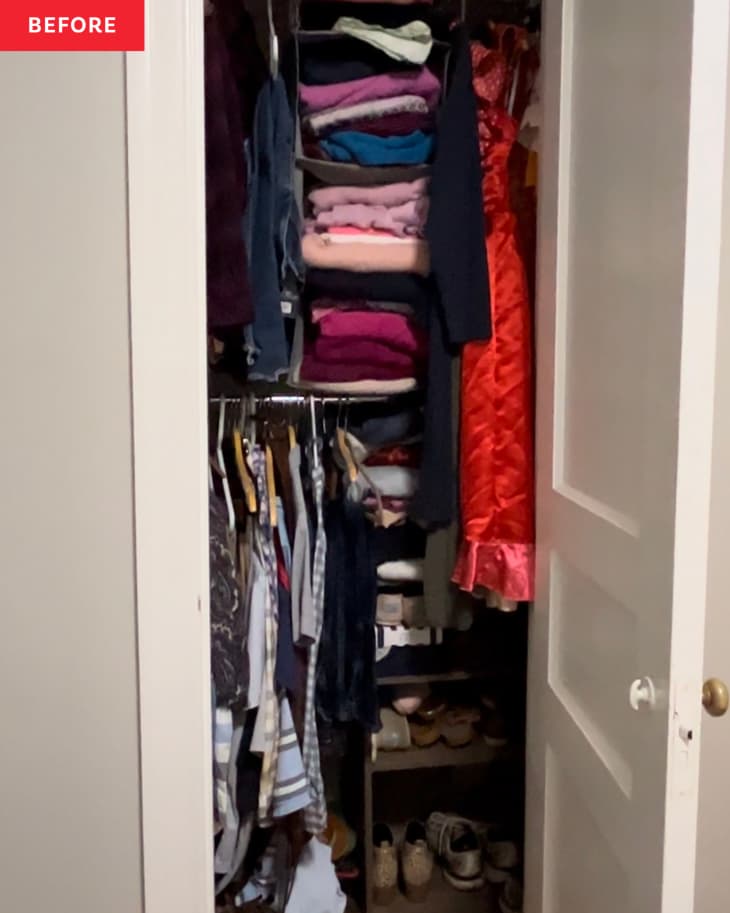
Michelle is an experienced furniture flipper, so almost everything in the room was DIY. “There’s not a lot youcan’tDIY,” she adds. Demoing the closet, building the shelves, and mounting barn doors made of plywood were all first-time projects for her.
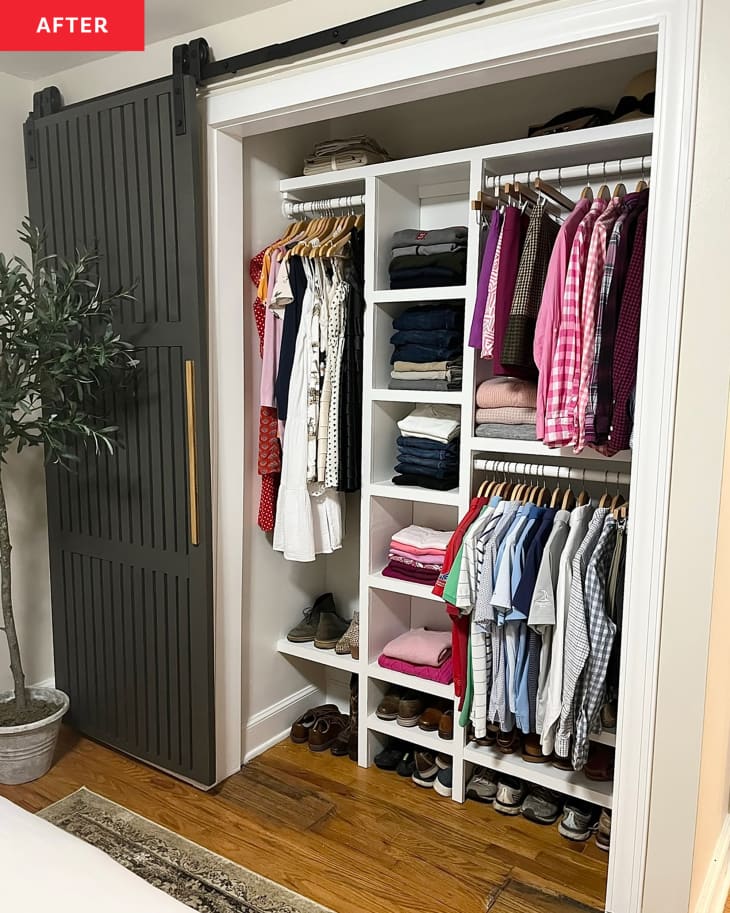
Michelle also used plywood to make the artwork and frames, and she used 4×1 and 3×1 lumber for the board-and-batten accent wall. For a bold statement, Michelle painted that accent wall with a deep green (Sherwin-Williams’ Pewter Green), while the rest of the walls areNatural Linenand the closet doors areUrbane Bronze.
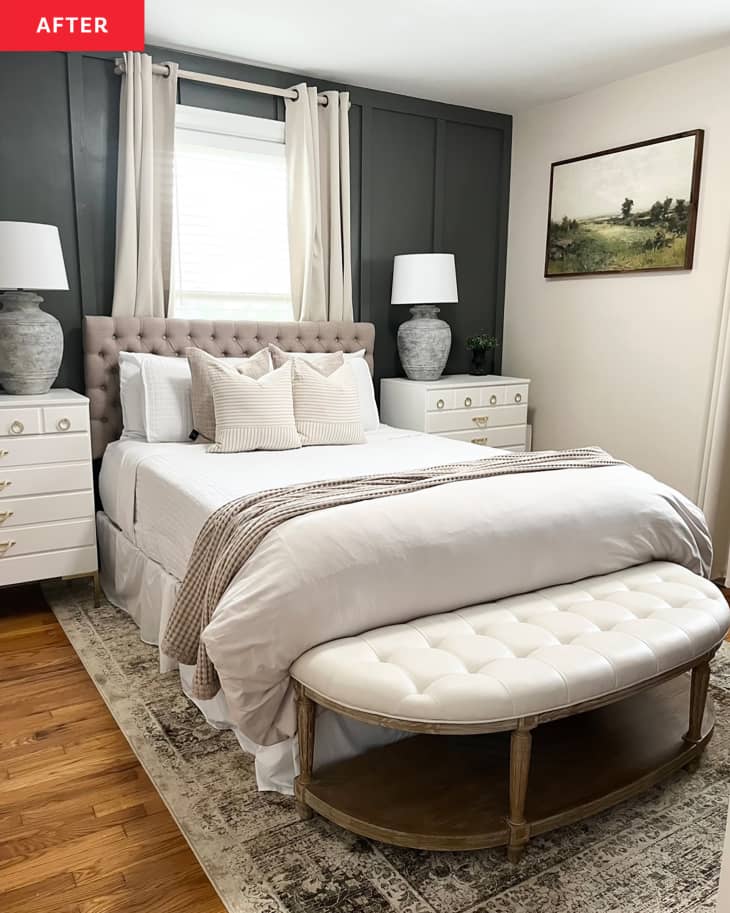
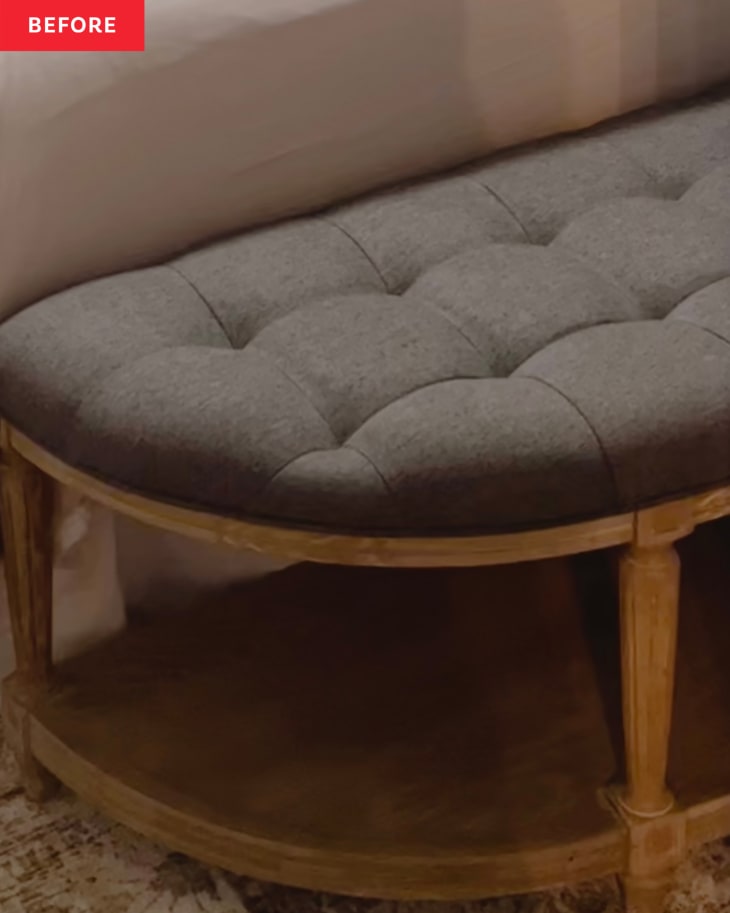
Michelle says the hardest part of the bedroom redo was hanging the heavy artwork, but installing the barn doors was a close second. Nevertheless, even the “easy” DIYs are worth calling out for the work they took — and for the money they saved. As part of the bedroom transformation, Michellepainted the fabric of the benchat the foot of her bed;flipped two beat-up brown dressers into white nightstandswithglam gold hardware; madea faux olive tree out of a real tree branch(plusa faux concrete planterto put it in); craftedconcrete lamp bases; and created a contemporary curtain rod out of a dowel.
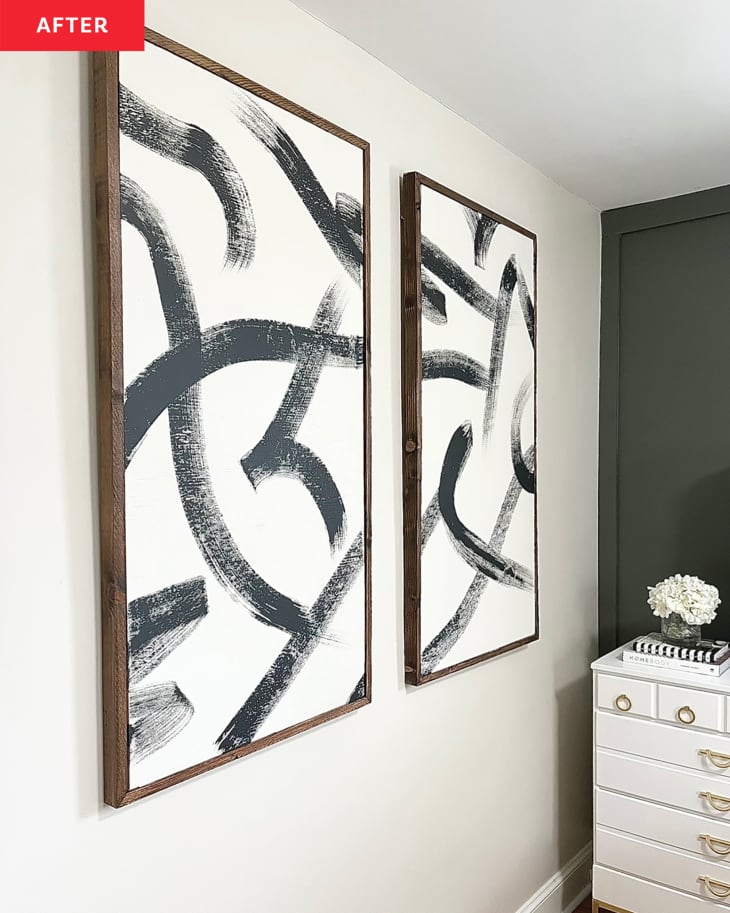
All those DIYs helped Michelle keep costs low. Her board-and-batten wall cost around $90, her artwork cost around $60, her dresser flip cost under $100, her lamps were free and she used leftover paint and compound to make them, and her olive tree cost about $30. Michelle completed the room with aSafavieh rugand cozy bedding (striped pillows,a quilt, anoatmeal-colored duvet, and awaffle blanket).
“I absolutely love every little detail about my bedroom,” Michelle says. “It’s so calming and serene. It makes me so happy to be there. I don’t think I’d do a thing differently!”
Inspired?Submit your own project here.