

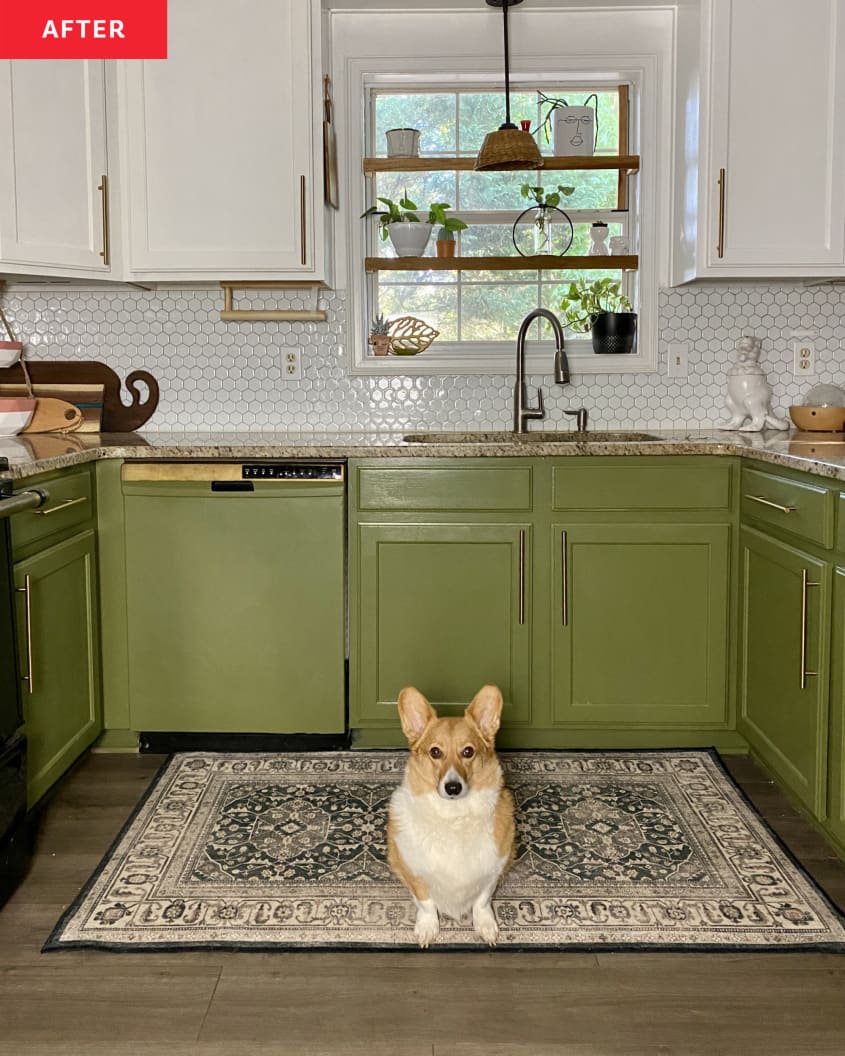
Before and After: 9 of the Most Colorful Appliance Redos Ever — and How to DIY the Look

Althoughthis might be changing, kitchen appliances of the past few decades have generally come in a standard selection of neutral finishes — think white, cream, black, stainless steel, and the like. The mid-century years were a welcome bit of fresh air in this regard, with popular appliance colors that included bold hues like mustard yellow and avocado green. But there’s no reason to limit yourself to standard finishes when your heart calls for something a little out-of-the-box.
Here are some of the most colorful appliance redos featured on Apartment Therapy over the years, and how they came to be. These DIYers created their own original colorful appliances with paint, vinyl, and contact paper — starting at just $20.

This $115 DIY Fridge Makeover Is for Smeg Lovers on a Budget
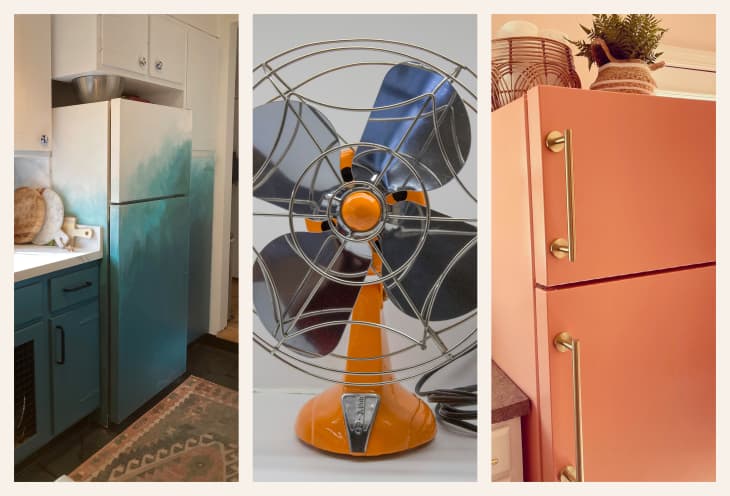
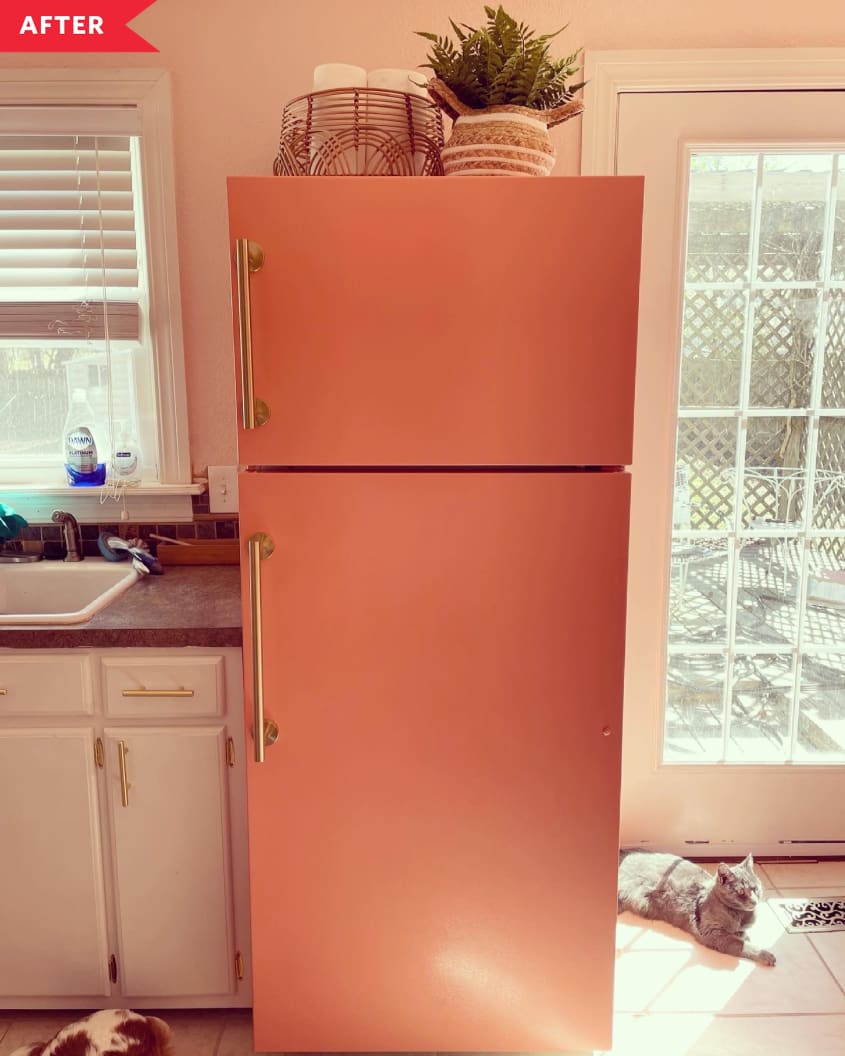
“I decided to give our existing fridge a makeover to make it more appealing because there’s no way we can afford a Smeg,”Tanna Bartlett, the owner of this now-pink refrigerator, says. Bartlett turned her white fridge pink with coral-colored paint (Sherwin-Williams’ Ravishing Coral.) To get the fridge’s glossy finish off, she used an electric sander and 120-grit sandpaper, primed the fridge, then painted it with five coats of acrylic enamel paint. Two other changes that made a difference? Bartlett changed which side of her fridge had handles to make it function better for daily use, and she swapped the handles altogether for something a bit more stylish and vintage-inspired. Fun fact: The new handles are actually$18 towel bars from Amazon, which were cheaper than appliance handles.
@apartmenttherapy@ashleyposkin shows how to vinyl wrap an oven ✨#homeproject # homeprojects #DIYproject #DIYprojects #vinylwrap #appliancemakeover #ovenmakeover #ovenbeforeandafter #appliancebeforeandafter #ovenDIY ♬ obsessed – sophia
A No-Paint, Reversible Redo for an Oven
Here’s another pink appliance idea that requires zero paint and can be removed if the homeowner decides she doesn’t like it anymore. DIYer and AT contributorAshley Poskinwrapped her oven in a heat-resistant vinyl and cut around the handles, vents, and glass window with an X-Acto knife. She removed the knobs first, held the vinyl in place with painters tape, and got the air bubbles out with a smoothing tool. The result: an oven (and fridge and dishwasher!) with a lot more personality.
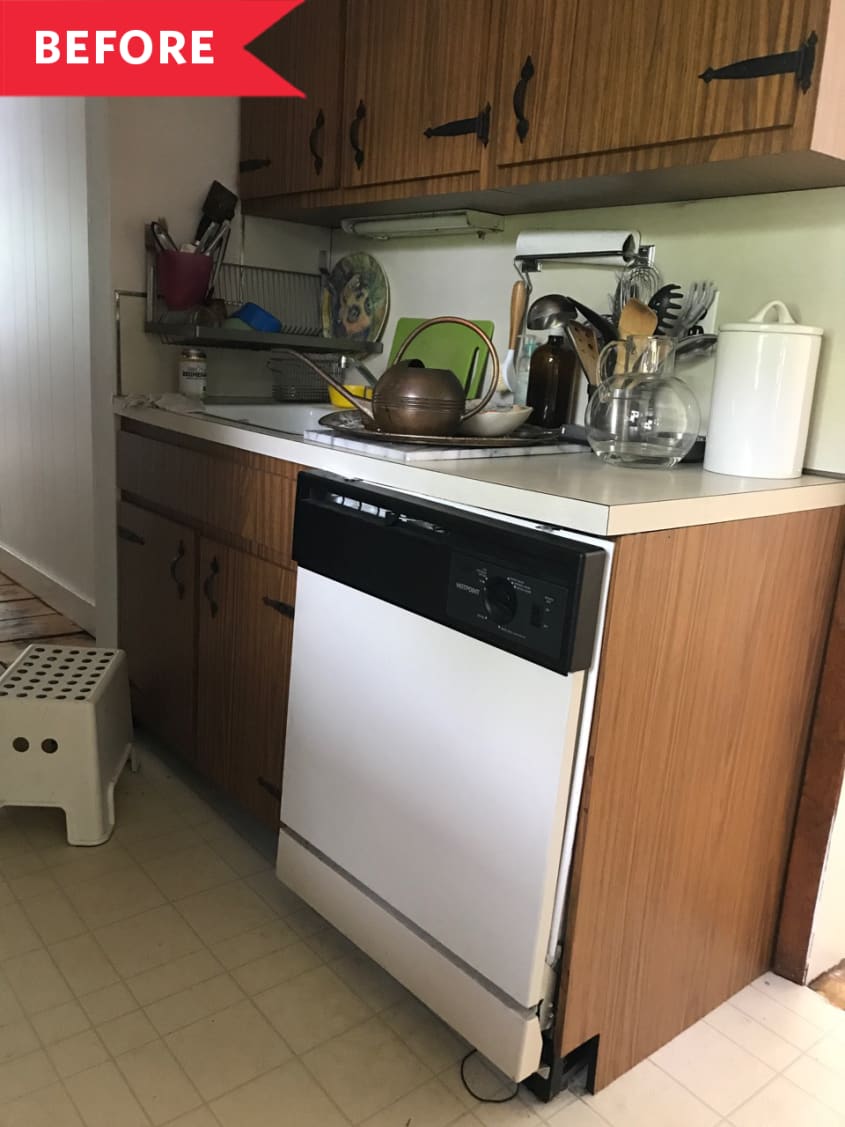
A Dishwasher Goes Green Thanks to a (Reversible!) Paint Project
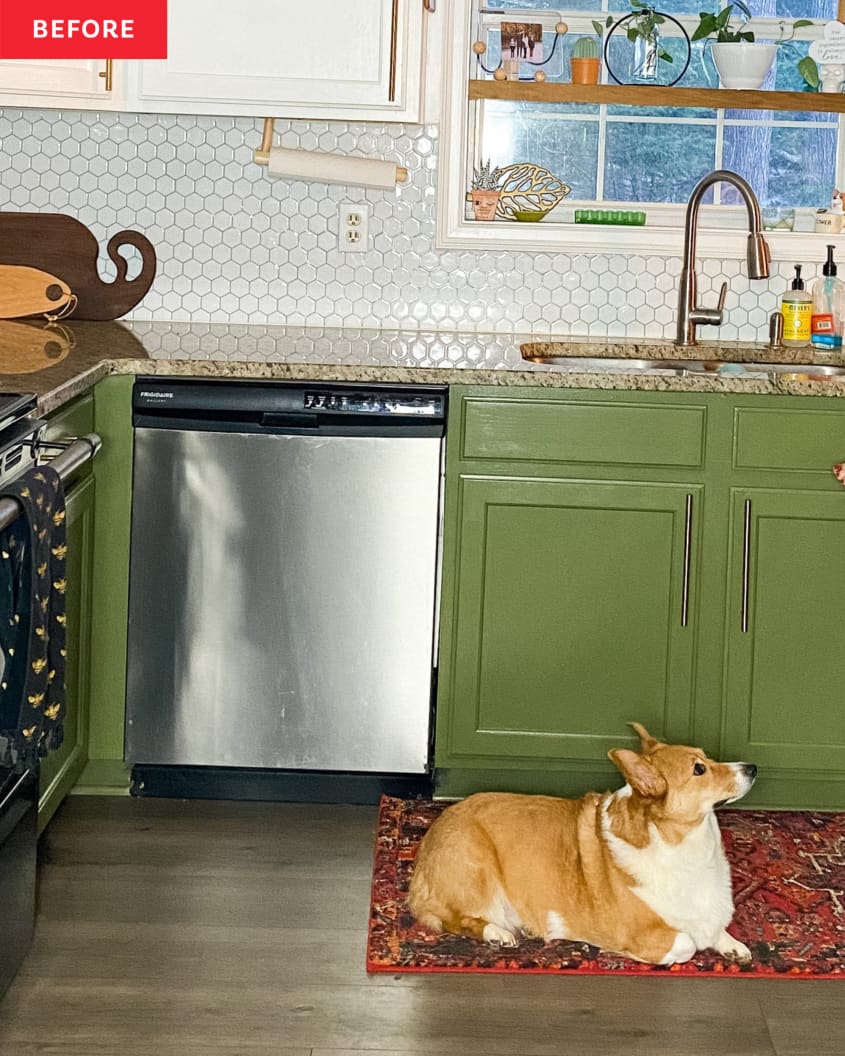
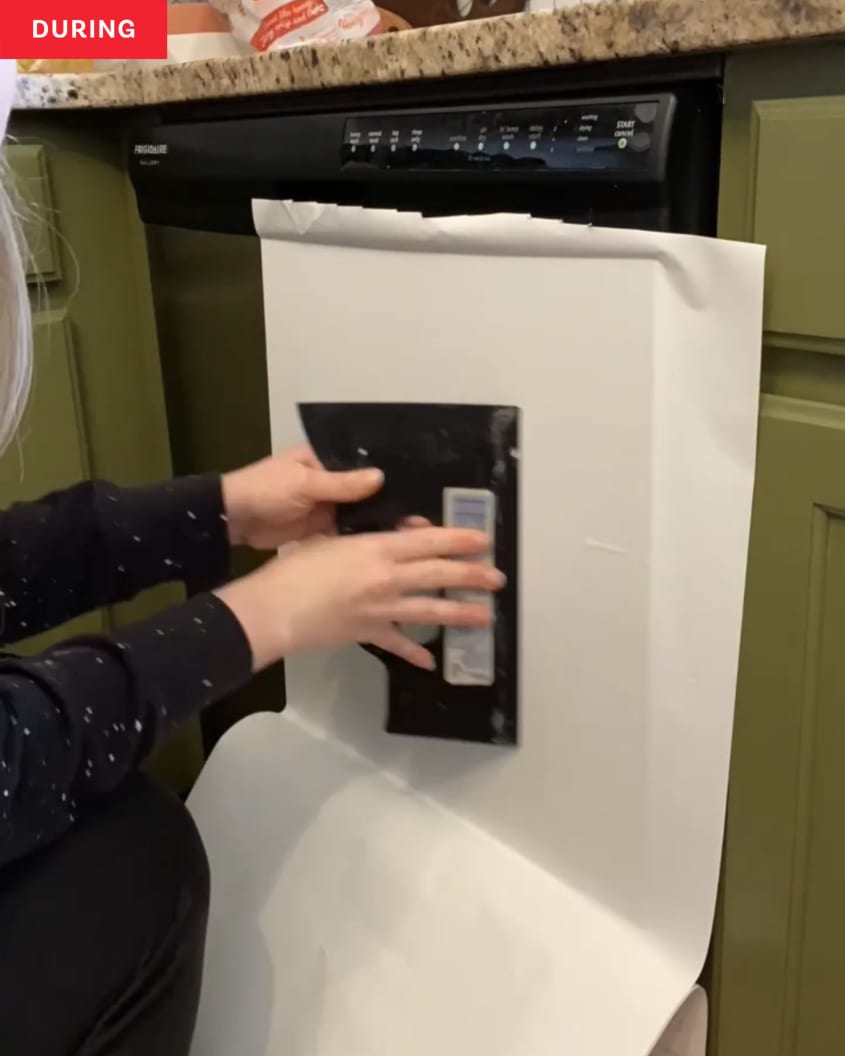
“I hate stainless steel,” DIYer Meg Baker (@baker.blooms) writes on her blog. “Personal preference.” After she painted her kitchen cabinets green (Behr’s Truly Olive), she felt like her existing stainless steel dishwasher stuck out too much — so she came up witha solution to camouflage it into her cabinets. First, she covered the stainless steel with contact paper, then she primed it and paintedthatwith a few coats of the same paint as the cabinets. Note that Baker made sure to do thisover contact paperin case she changed her mind and wanted to go back to stainless steel. “At this point, the top was still black and I thought, that’s fine and all, but this is an experiment so I better go all in,” she says of her next steps. “So out came thegold Rub n Buff.” The result? A glam green and gold dishwasher that’s one-of-a-kind.
About six months later,Baker removed the contact paperin preparation for installing her new dishwasher. It left some residue behind, which she says she was able to remove with WD-40 and gentle scraping. The gold Rub n Buff, though, was much more difficult to remove; Baker suggests skipping that step if you’re a renter.
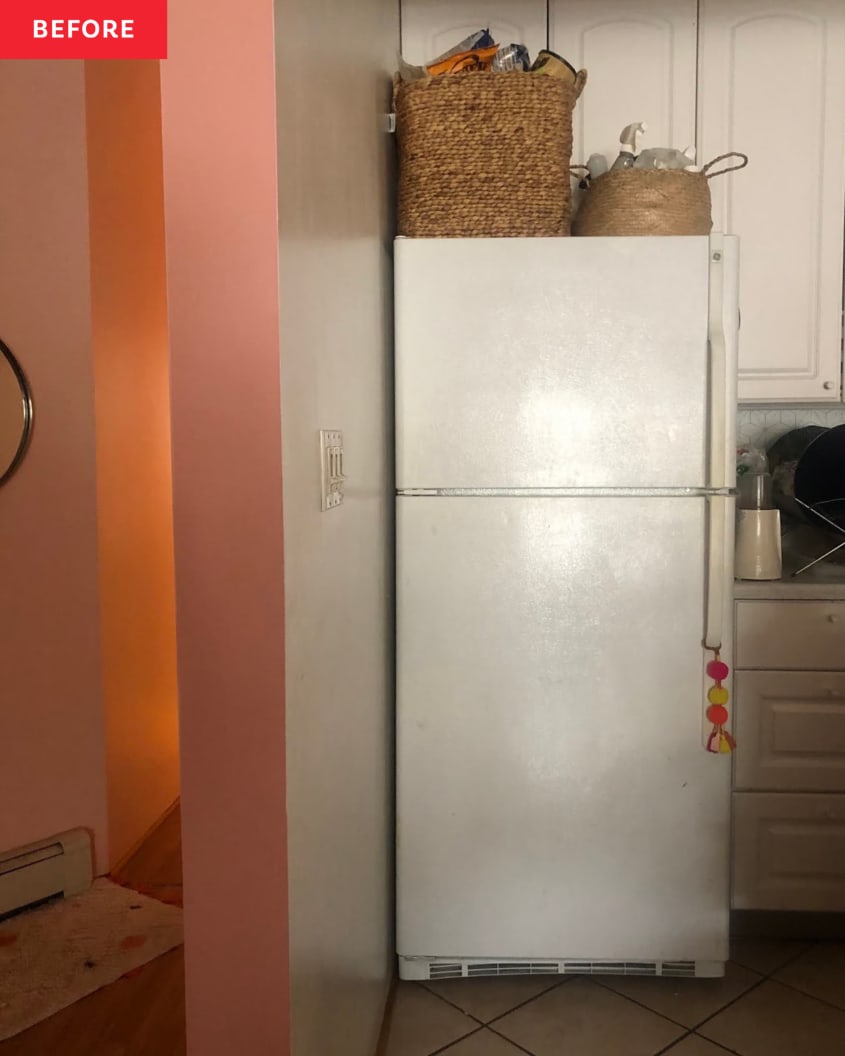
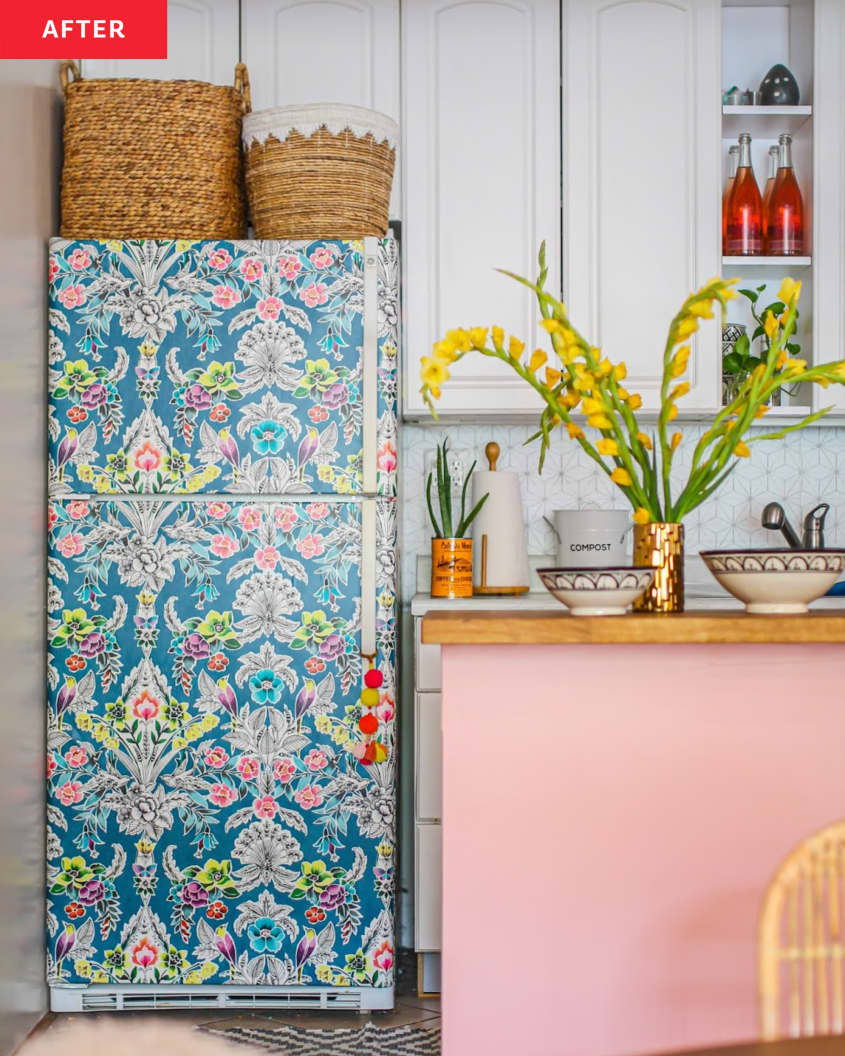
Color Plus Pattern Revive a Rental Apartment Fridge
It just makes sense that DIYer and content creatorMegan Zietz’s wallpaper-filled homewould also have a wallpapered fridge. Contact paper or removable wallpaper are two other great options for making a fridge colorful; Zietz used thismulticolor wallpaper from Amazon. She unscrewed the handles from her fridge, added the peel-and-stick, then screwed the handles back on. Because she wasn’t wallpapering a whole wall, the DIY only took one roll, which cost just $30.
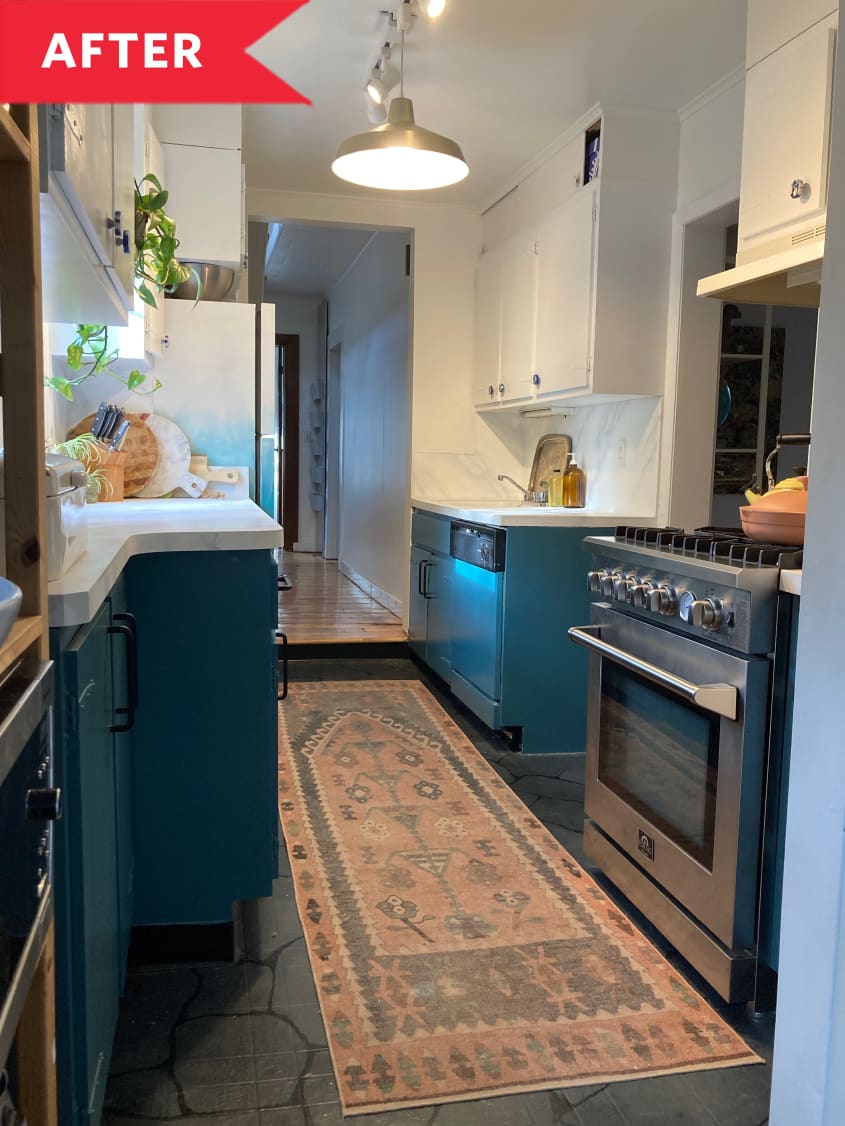
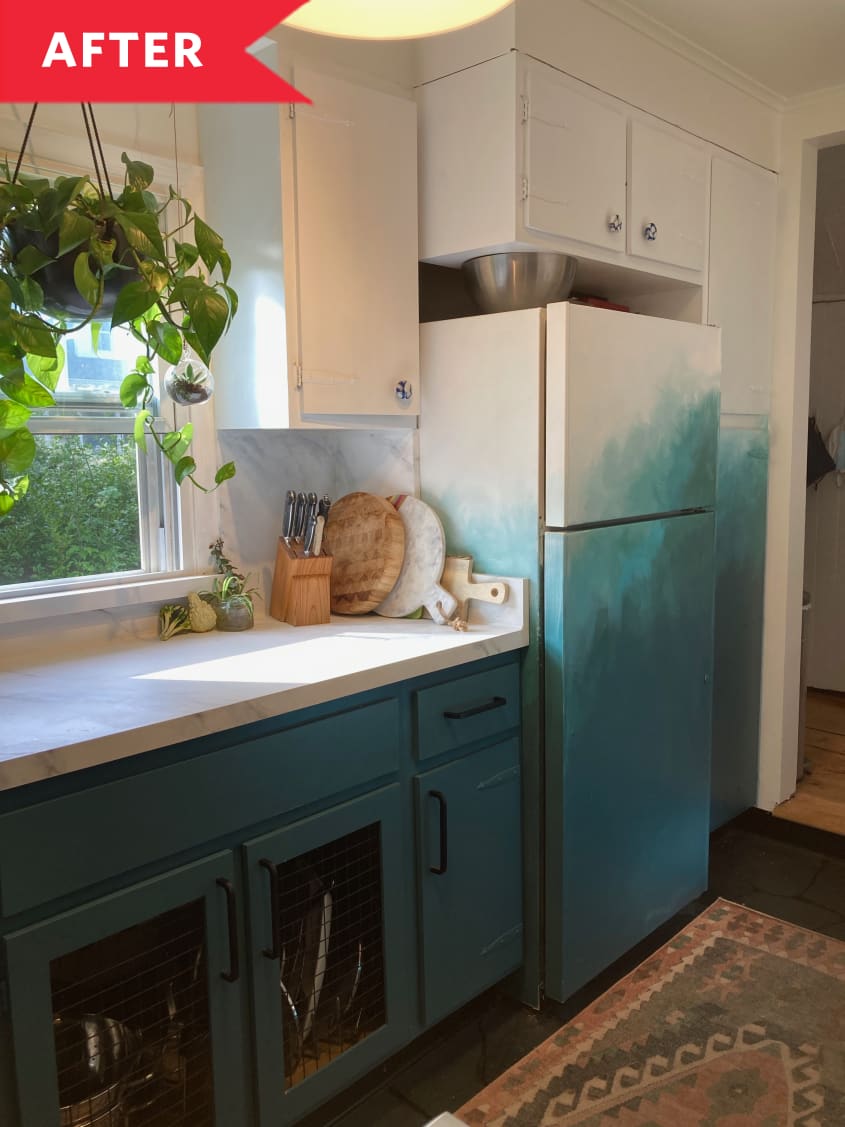
A Kitchen withTwoTeal Appliance Upgrades — and One of Them Is Ombre!
“Who says you can’t paint a fridge?!” Adrianna Gardini, the owner of this teal kitchen says. When Adrianna and her husband realized a gut reno wasn’t in the budget, they started pouring paint. “We just painted EVERYTHING!” Gardini says — dishwasher and refrigerator included. But first, they primed their surfaces with oil-based, stain-blocking, bonding primer. For the dishwasher, they used teal (Behr’sSophisticated Teal) for a built-in look with the cabinets, and for the dishwasher, they used the same color but experimented with ombre. Gardini says it was “truly liberating” to use paint on almost every surface of her kitchen —you can see the full redo here— and she definitely recommends it. “I think that’s when the magic happens, when you don’t have to think about the permanence of a real piece of stone or what tiles you can’t afford,” she says. “Just have fun!”
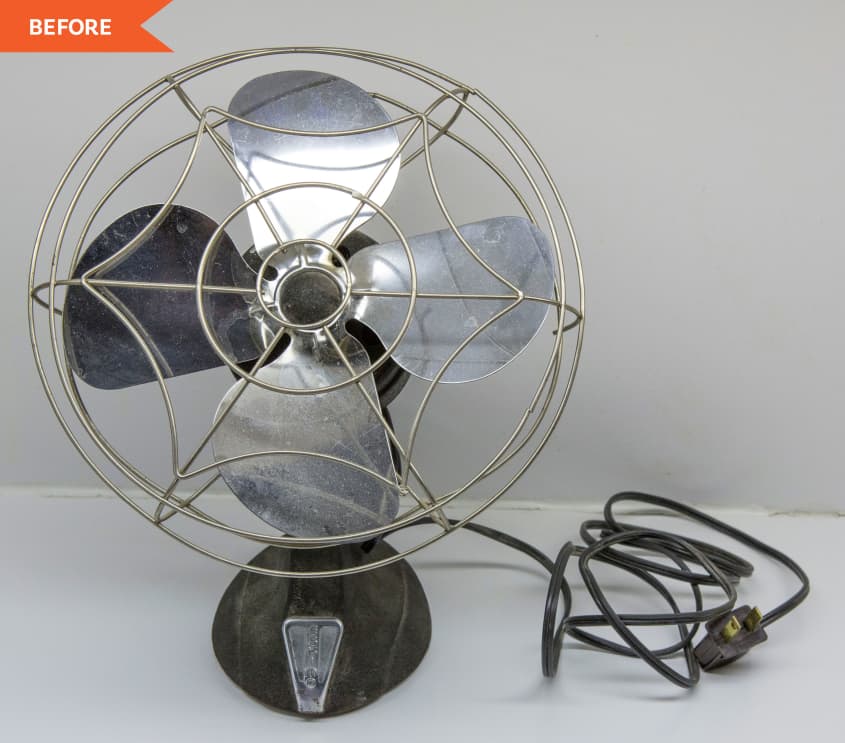
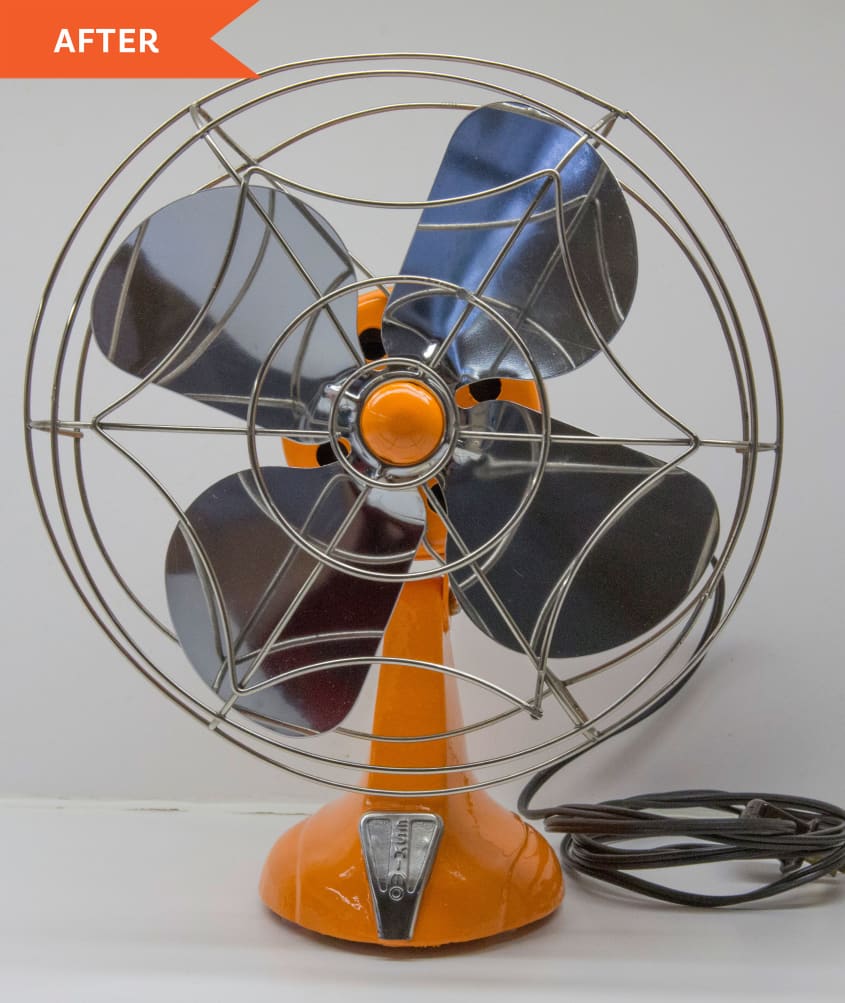
A 1940s Fan Found in the Trash Gets a Groovy Orange Redo for Just $20
DIYer Justin Labinskifound this vintage Eskimo fan in the trash. Knowing he could make some repairs to the inside to get it spinning again, he nabbed it, resoldered the wiring inside, lubed the bearings with some3-in-1 oil, scuffed and wire-brushed the exterior down to bare metal, and re-sprayed the exterior with orange spray paint. “I knew this cool piece of history needed to be saved,” Labinski says of his 1940s fan that retails for anywhere from $50 to $800 on some vintage and secondhand sites. (Labinski restored his for $20.) His favorite part of the after? The bright new color. Here at AT, we’re pretty bigfansof bold colors, too.
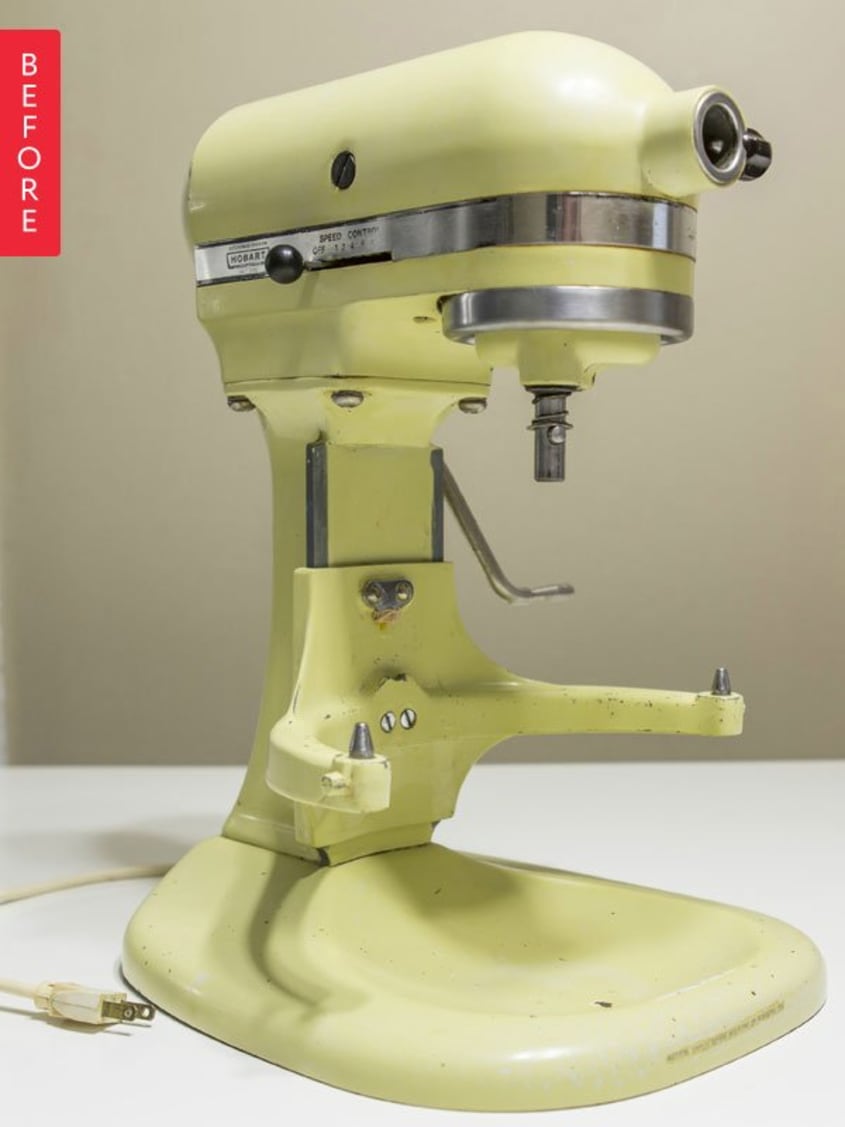
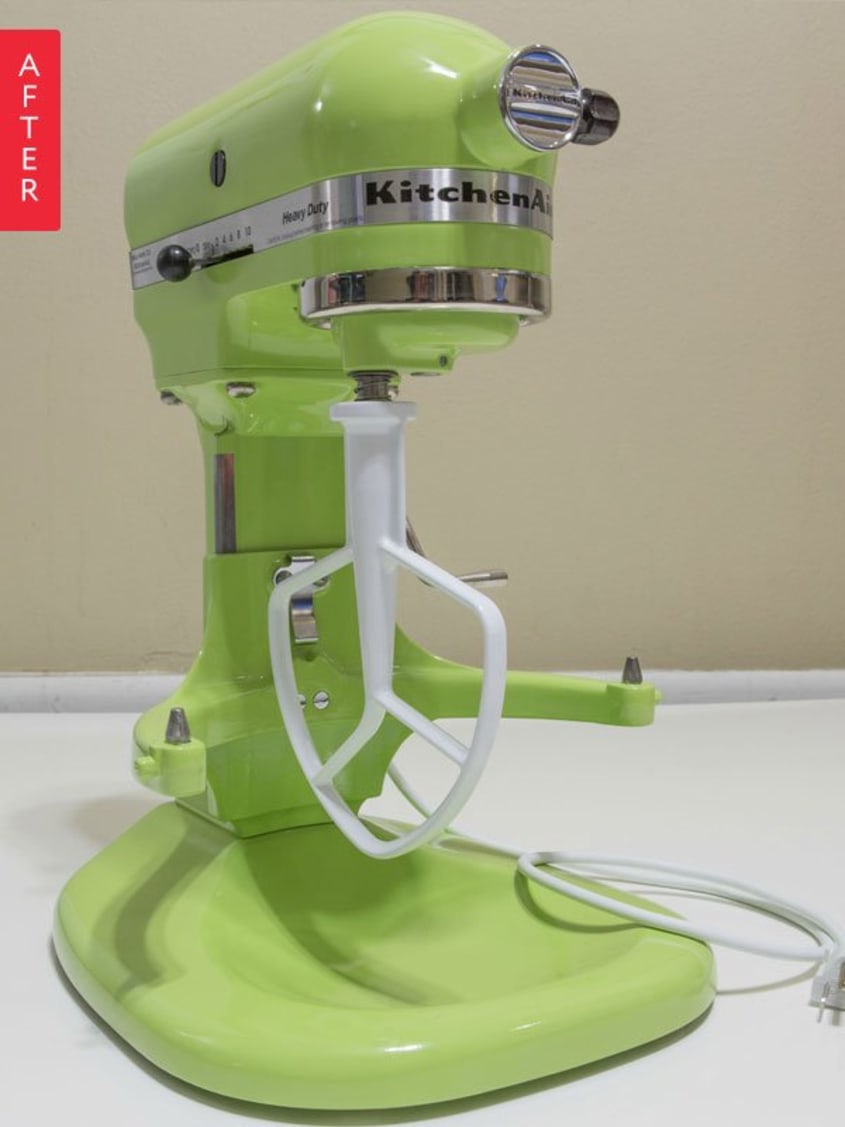
This DIY Project Adds a KitchenAid Redo in the Mix
Labinski also got some major bang for his buck when he found this 1980s KitchenAid mixer on Craigslist and restored it to working condition, but not withoutsome major TLC. The 43-year-old mixer was filled with about that many years’ worth of gunk and grease. Labinski cleaned the inside, re-greased it, and before re-assembling it, used a similar sand and scuff process as above to strip it down to a bare metal. His paint choice this time was lime green. “I did a three stage paint job,”he writes. “White primer for a brighter base of green and finally a nice thick coat of automotive clear for durability.”
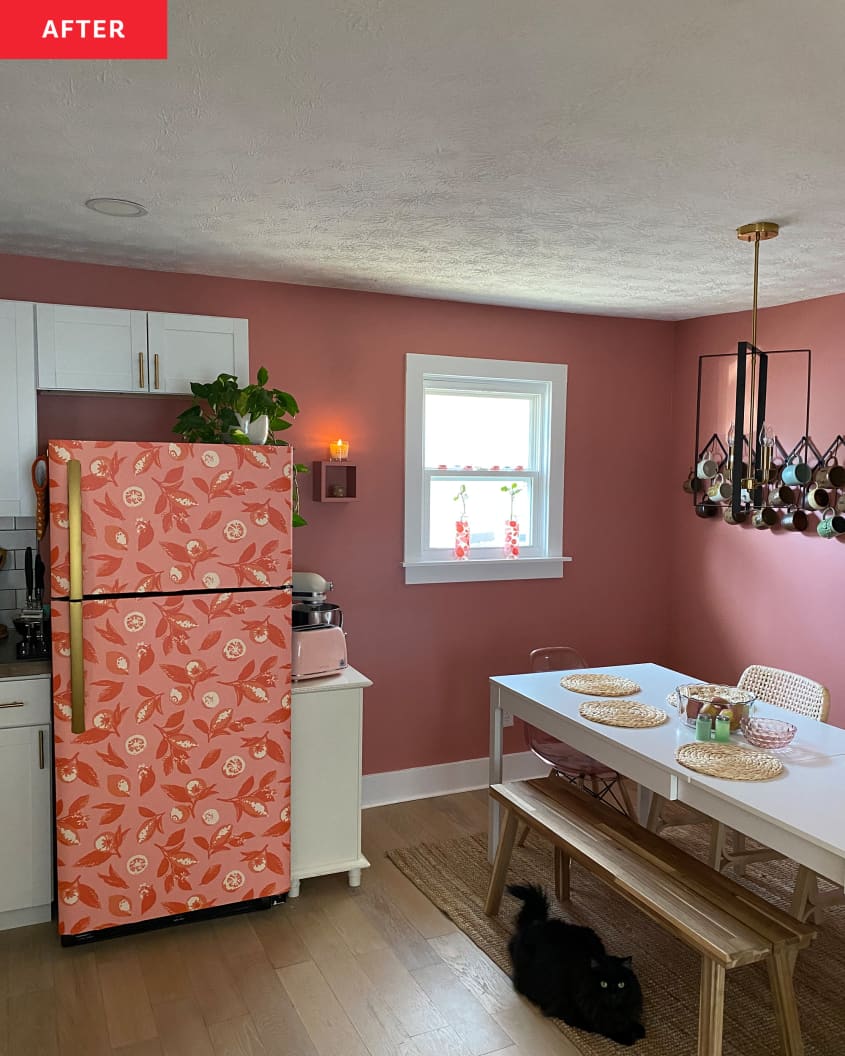
A Fun, Fruity Fridge Gives This Gray Kitchen Some Much-Needed Pep
When Alexandra Nagy (@alexandra2023) moved into her apartment, the kitchen was very nice and new, but it was very monochromatic. Nagycovered the place in pink— including on the fridge. “This was a very quick DIY,” Nagy says. “The hardest part was picking out which wallpaper I wanted to use.” (Who says fruit can’t go on theoutside冰箱的吗?)她peel-and-stick壁纸is from Spoonflower, and the project cost about $115. The total includes the gold tape she used to cover the fridge handles, too.
For even more colorful appliances, check outthis head-to-toe pink kitchen.
Inspired?Submit your own project here.