

Before and After: A Gray-on-Gray Bathroom Gets a Bright Facelift for Just $200

When my fiancé and I moved into our early 20th-century home two years ago, it would’ve been an understatement to say that it needed a lot of work — and an overstatement to say that we had the funds to transform it.
So we started with the obvious but least glamorous options. We covered the house witha fresh coat of paint, pared backthe overgrown backyard, installed a new water heater, updated the electrical, and then moved on to more enjoyable improvements like aprimary bedroom renovationandliving room built-ins.
Finally, a few months ago, I decided to do something about our bathroom.
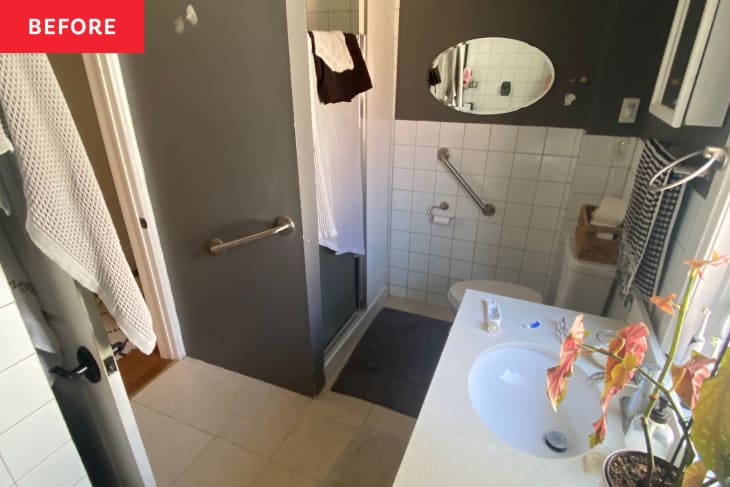
The one bathroom in our house jumped out at us when we first toured it, but for all the wrong reasons. It has the irritating quality of being sizable yet cramped, thanks to a standing shower that’s used regularly and a shower/bathtub combination that’s not. The walls were also a complete travesty of lumpy and uneven plaster, which had been painted over so hastily that the resulting finish only made the room look worse. And yet, we lived with it all for months on end, hoping that we’d somehow have the funds to do a complete overhaul in the midst of those aforementioned necessities. I figured that a major shift was too far away to wait, so I gave ita facelift without any major renovations, while sticking to a tight budget.

墙壁需要首先解决。我删除了all of the existing fixtures and hardware, and then spent several days mudding, sanding, and then mudding every wall again (plus a few spots on the ceiling). It’s admittedly not perfect, but looks significantly better than before. Next, new paint was in order. I normally gravitate toward shades of white to keep things bright, but because the wall tiles and vanity countertop were already that color, I worried about creating a design that felt sterile. Instead, I opted for Behr’sExplorer Khaki (N330-4), a taupe hue that adds just a hint of dimension. After the walls were finished, I mixed some of the leftover paint with white to create a custom beige blend for the vanity, and then switched out its large stainless steel pulls for small gold knobs.
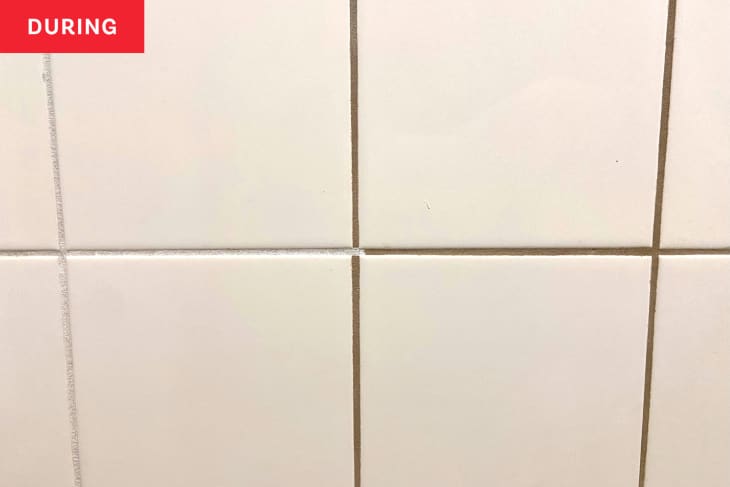
On somewhat of a whim, I bought awhite grout paint pen from Amazonfor the next stage of the project. The bathroom’s white tiles and brown grout had been irking me for a while, but I wasn’t sure which low-effort options I had to remedy it. These paint pens pleasantly surprised me. While the process took some time and patience — and more pens than I initially anticipated — the results have been holding up well so far. In fact, painting the grout white turned into one of my favorite small details. It makes the room feel airier, without adding any other accessories to the space.
For extra storage, my fiancé built and installed wood shelves to replace the MDF versions next to the bathtub that we use for towels and toiletries. If you don’t have large power tools at home for this kind of project, you can always get wood pre-cut at your local hardware store or buy prefab shelves.
Lastly, I focused on hardware, fixtures, and textiles to finish off the space, sourcing what I already owned or found atthrift stores. My one “large” purchase for the room was theBlooming Fields shower curtain from Schoolhouse. It’s on the expensive side as far as bathroom decor goes, but I absolutely love the floral pattern and colors.
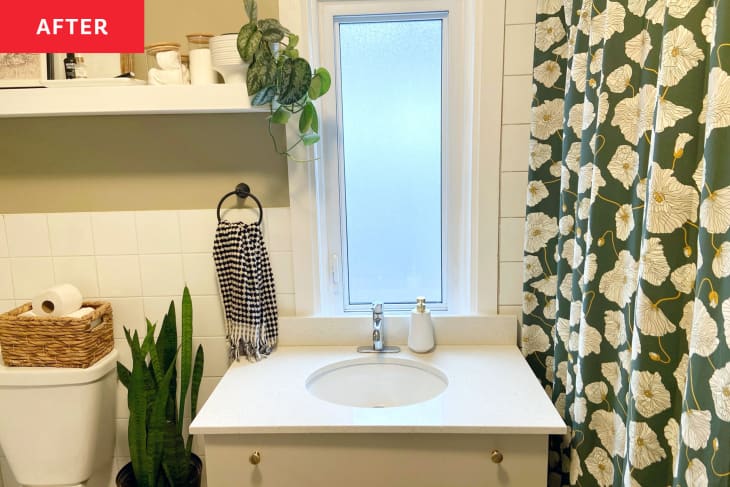
Overall, this project cost about $200, and has made such a difference in how we enjoy our home. We still have a secondary shower, which we now use to store cleaning supplies, and we still plan on completely renovating it sometime in the future. But for now, this low-cost makeover is exactly what we needed to keep us motivated.