

How To Turn Any Wall Into A Statement Wall
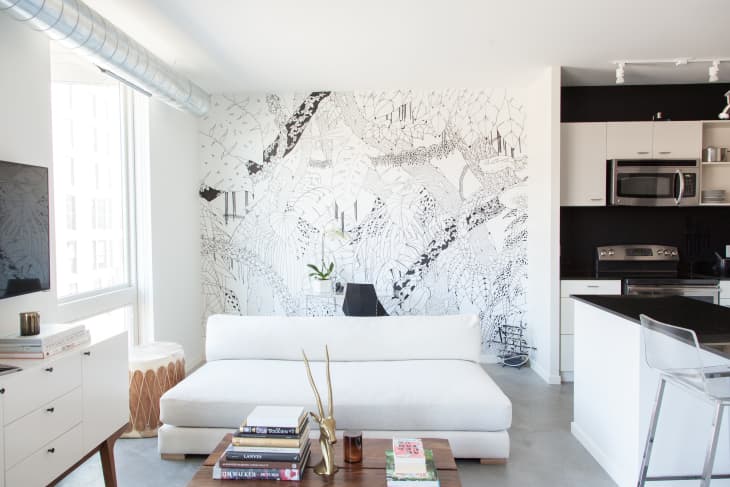

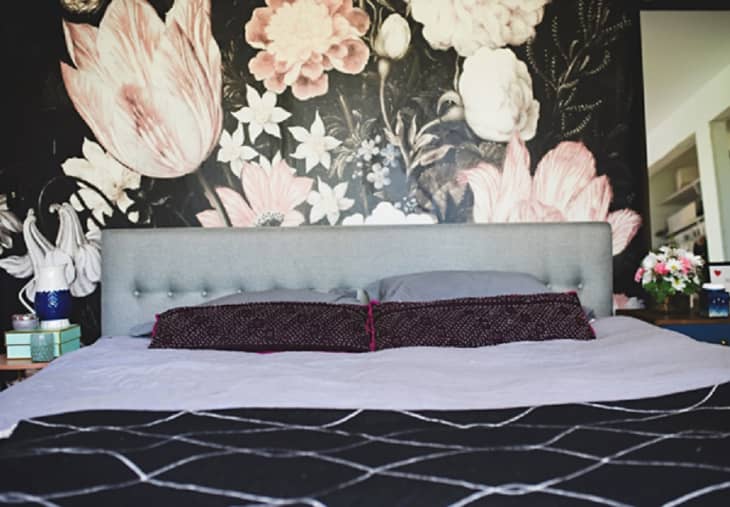
If you want to create an amazing mural like Nic and Andrew’s (above), the instructions are, unfortunately, “Be an amazing artist,” but we’ve rounded up 13 projects with thorough tutorials and simple supply lists. Whether you’re a renter looking to spend only a few bucks or a homeowner ready to splash out, there’s surely a DIY statement wall here for you!
DIY Large Scale Wall Stencilby Mr. Kate
To make this elegant wall your own, download the stencil design, print it, trace it onto a large plastic sheet, cut out the stencil, and go to town with a foam roller. As shown, the design is beautifully subtle, but you could definitely make it your own with bold hues.

Glitter Wall DIYby A Joyful Riot
Is there any substance you can put on a wall that makes more of a statement than glitter? Definitely not. This tutorial has you paint a wall in the color of your choice (not necessary if you’re happy with the color already), and then create a sparkling glaze using glossy Mod Podge and three sizes of iridescent glitter. If a glittery pedicure can bring you a tiny bit of joy, just imagine how happy this wall will make you!
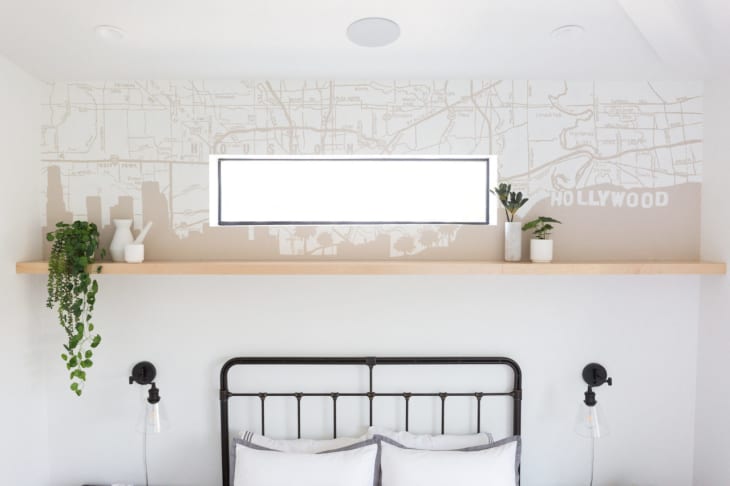
DIY Map Wall Muralby Mr. Kate
Adorn your wall with a map of a beloved city, or use Photoshop to combine two or more meaningful places. Once you have your digital design complete, project it onto your wall using a flash drive and a projector, adjusting the size if necessary. Don’t be intimidated! It’s going to look charming, and it’s not like anyone will have to use it to actually navigate.
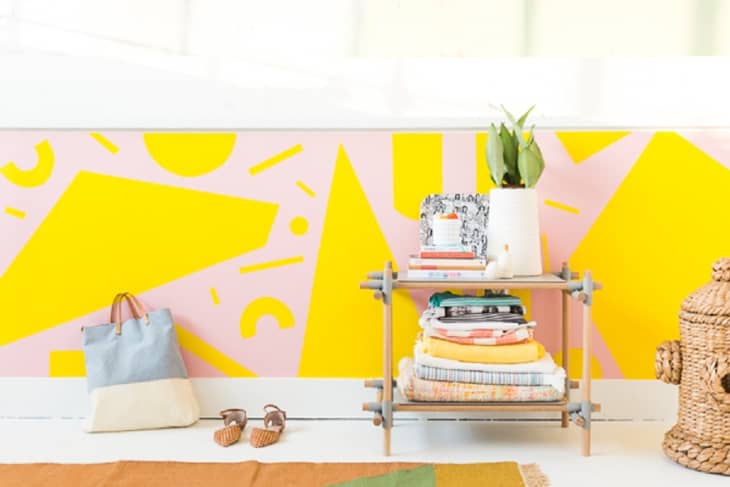
DIY Geometric Studio Muralby Paper & Stitch
Sketch a design and then lay it out on your wall with painter’s tape, or just go freehand if you’re very confident. You could stick with two colors as shown here, or go fullSaved By The Bell.

DIY Watercolor Wall Muralby Mr. Kate
Remember rag painting? Bring that trend into the 21st Century by making yourself a delicate, dreamy watercolor mural. The trick is to thin paint with glaze so that it’s sheer, work quickly, and blend carefully.
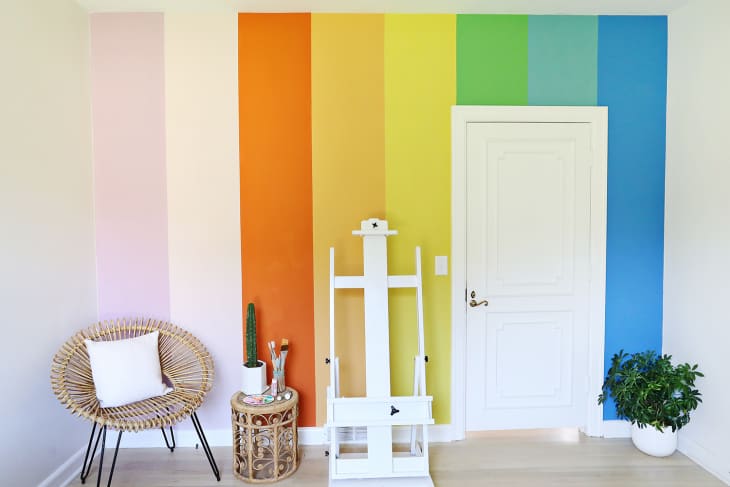
DIY Rainbow Accent Wallby A Beautiful Mess
Head to the paint department and create a rainbow that pleasesyou—the colors don’t have to be from the same line or even brand, just a combination of hues that make you happy. Divide the size of your wall by the number of colors you want to use so that each rainbow stripe is equal, or go a bit more random if you prefer.
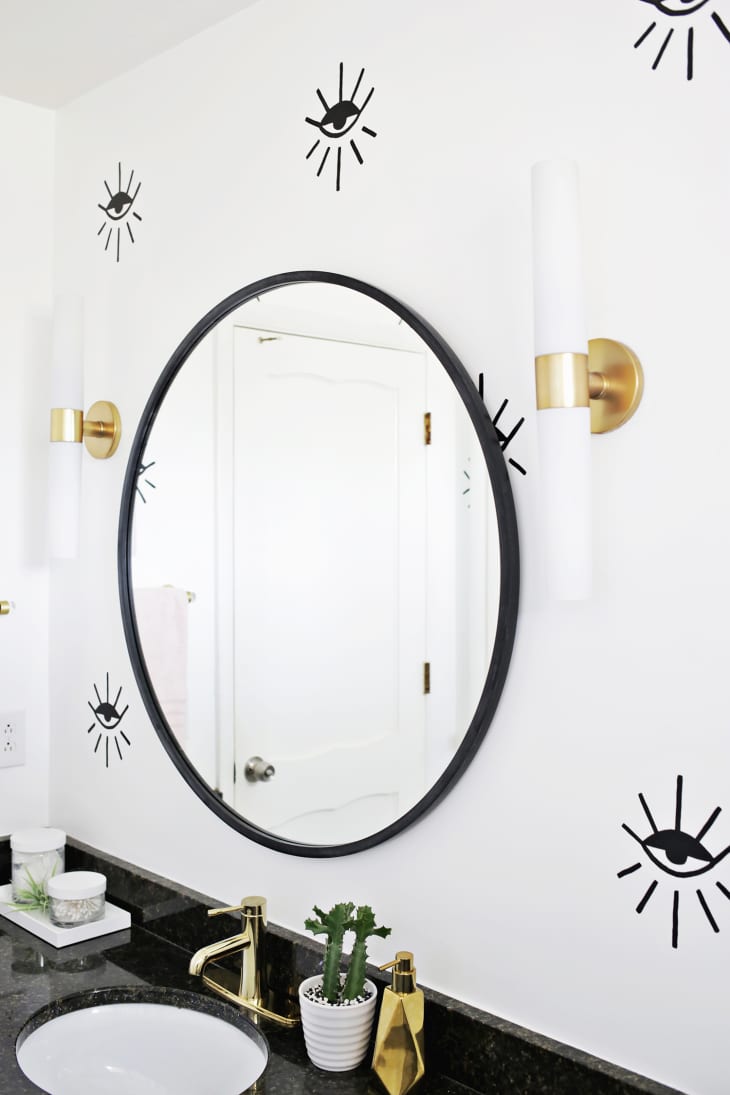
Painted Eye Statement Wall DIYby A Beautiful Mess
Here’s a stenciling project that’s definitely non-standard—and it can be yours, if you happen to have a printer.
Striped Accent Wall Without Paintby Homey Oh My
This tiny wall packs so much punch, thanks to its fabulously bold stripes which are actually vinyl tape. What’s the secret behind this paint-free project? You could do any color or combination of colors and change it up whenever you’re in the mood!
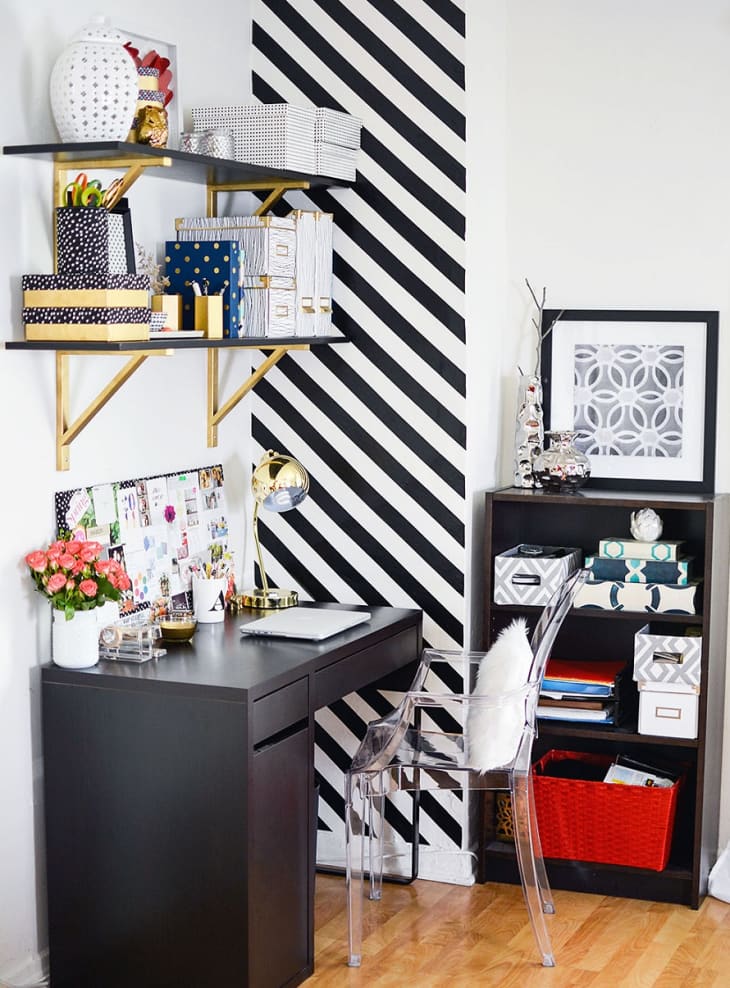
The dueling diagonals in this room make me feel a bit topsy-turvy, but if you’re a sturdier sort, check out the tutorial. The secret is in careful taping. There’s info on the subtly herringbone closet doors on theLovely Indeed Instagram, and you could recreate the look on a wall if you preferred.
Large Paper Mural Wallby A Subtle Revelry
This is the priciest project of the bunch, as it involves a nearly $600 mural purchased from Etsy. But the results are showstopping!
Wallpapered Statement Wallby A Subtle Revelry
An accent wall is the perfect project for first-time wallpapering. Pick a small, manageable wall, knowing that it will still have a big impact.
How To Change Your Wall Color Without Painting Your Wallsby Paper & Stitch
Change a wall’s color without painting it, you say? Create a bold faux wall—either full or partial—that you can move about your home whenever the mood strikes. This example is actually a stretched canvas. Click over toPaper & Stitchto see how they pulled this renter-friendly option off.
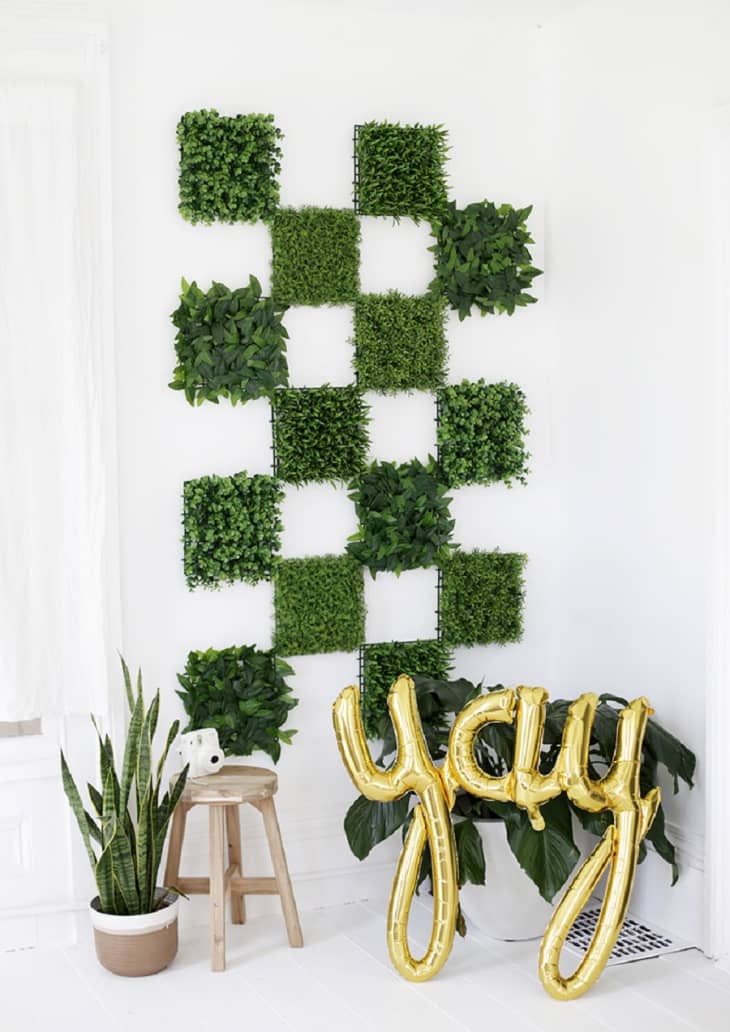
This tutorial was designed as a photo backdrop for a party, but it would be difficult to remove something so fun and lush once it’s installed! Adorn your wall with a grid made of greenery mats hung from tiny command hooks, and try to resist the urge to green all of your walls.