

How to Use a Tape Measure the Right Way


Measuring tapes are one tool that you’ll find in every homeowner and apartment dweller’s toolbox, no matter their level of skill. We use them to hang artwork, and to figure out the size rug we need for a room, but are we using them to their fullest capabilities? Here are some basics on how to use a tape measure properly, along with some tips and tricks we bet you didn’t know.
1. Tape Measure Basics
Tape measures come in a range of sizes, from 6′ to 40′ (and even larger). Shorter tapes are best for smaller scale interior projects like hanging artwork or measuring cabinets. Longer tapes (25′ and up) are best for large scale projects like framing, decks, and outdoor projects.
There are a few key parts to know about tape measures, so let’s start by first identifying them so we don’t continue ahead calling them the “push button thingie” or “loose metal part”. Ready? Here we go:
Tape
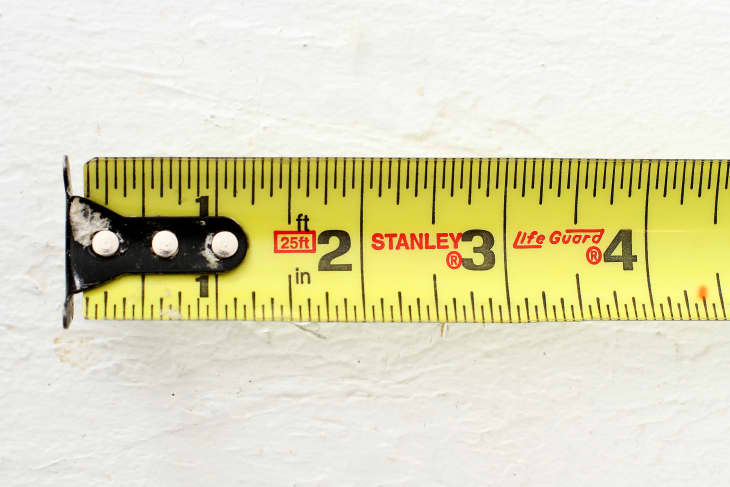
The tape is the yellow (sometimes white) coiled ruler with all the numeric measurements printed on it. The wider the tape, the stronger it is. A wide tape can extend further without buckling, and will hold up over time better than a small, narrow tape. Tapes are also curved so that they’ll keep their structure, even when extended to great lengths. When taking a measurement, always turn your tape so that the edge lays flat on the surface to find the exact measurement.
Push Button Stop
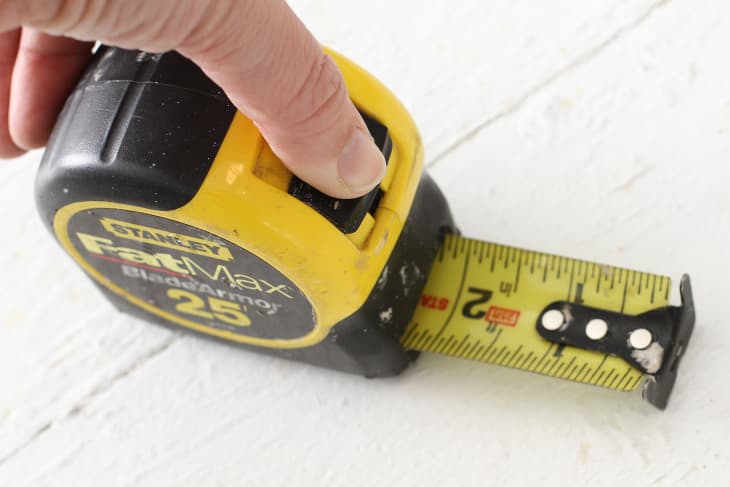
Your tape connects to a flat spring that is coiled around a post inside the housing. This spring is what makes the tape recoil after it’s extended. Once extended, keep your tape in place by pushing down on the lock button.
Housing and Belt Clip
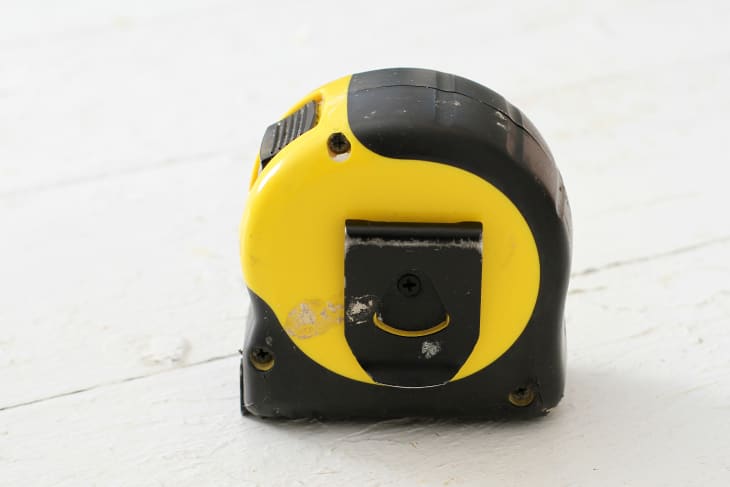
The case which holds the tape is called the “housing.” It can be either plastic or metal, and keeps the coiled tape from expanding. On the back side of the housing you’ll almost always find a belt clip meant for easy access while working on a project.
Hooked End Tab

The hooked tab has quite a few hidden features you can read more about below, but its main functions are to hook onto the end of whatever you’re measuring, and keep the tape from disappearing inside the housing when it recoils.
How To Read A Tape Measure
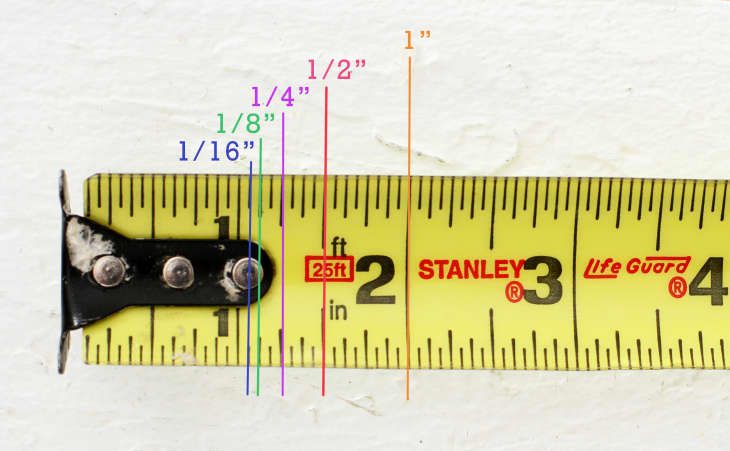
Glancing at a tape measure can be somewhat dizzying: There are no shortage of little lines. The main thing to keep in mind is that the size of the line, or hash mark, corresponds with the size of the measurement unit. The longer the line, the bigger the unit of measurement. The shorter the hash mark, the smaller the increment.
Tape Measure Marks
1″:Inches are the easiest measurement to read on a tape measure. Not only does the line extend all the way across the tape, but there’s also a big bold number announcing each inch, so it’s simple to count and keep track as you measure.
After that, it’s just about halving each incremental unit of measurement:
1/2″:There are 2 half inches in one inch. The half-inch marking is the next longest line between the full inch marks.
1/4″:There are 4 quarter inches in one inch. The quarter inch markings are just a bit shorter than the half inch mark. Two quarter inches equal one half inch.
1/8″:There are eight eighth inches in one inch. The eighth inch markings are the second shortest markings. Two eighth inches equal one quarter.
1/16″:There are 16 sixteenth inches in one inch. This is the smallest line you’ll find on the ruler. Two sixteenth markings equal one eighth.
12″ or 1 Foot: For every 12 inches, you’ll (often, but not always) see a black arrow that tells you that you’ve hit the one-foot mark, the two-foot mark, the three-foot mark, and so on down the length of the tape. These handy markers make it easier to add up all those individual inches.
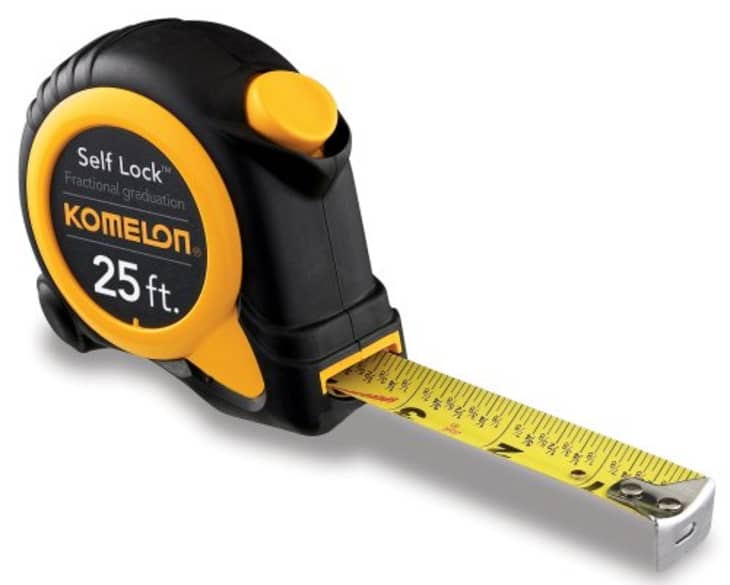
You can also buy tape measures, like this one fromKomelon, which prints the fractions right on the tape, which makes the increments easier to read.
How to Use a Tape Measure
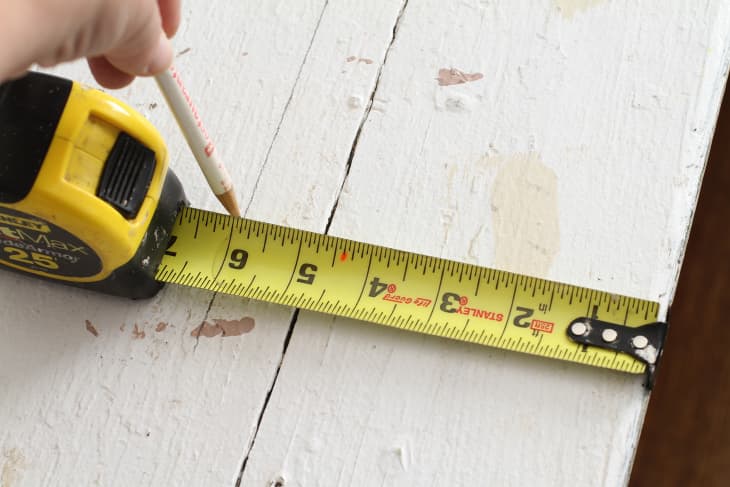
Start by putting the end tab at one end of the item or space you want to measure, then pull out the tape until you get to the other end. Then, take a measurement reading. To determine the length, you’ll need to add up the increments. If your item is exactly, say, 3″ or 3′, it’s much easier. Otherwise, add up the fractions of inches until you have an accurate measurement.
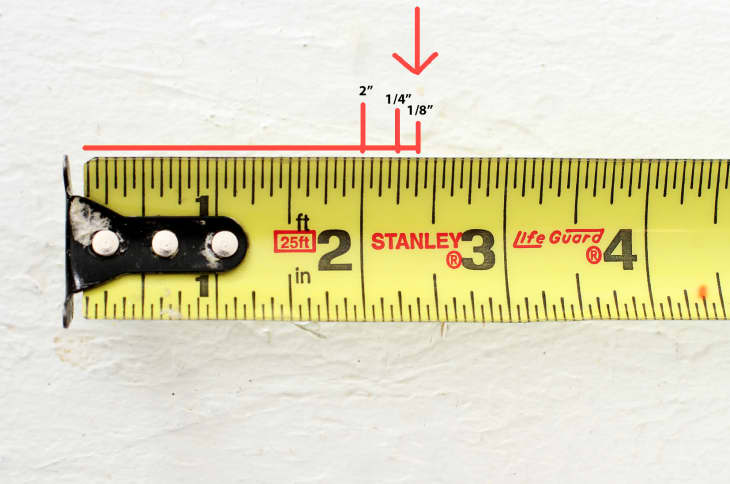
If you measure out to the arrow in the above photo, you’ll add up 2″ + 1/4″ (or 2/8″) + 1/8″ for a total of 2 and 3/8″.
A few tips
- Try to keep the tape as straight as possible while measuring. If it sags, you won’t get an accurate read.
- If you are marking your measurement, use a “v” (instead of a single line) for accuracy, with the bottom point directly on your measurement.
- When you’re done with the tape measure, try not to allow the tape to slam back into the housing at full speed. A good habit is to place your finger below the tape on the housing as a buffer between the tab and the housing when the tape recoils. Better yet, reel it in slowly so you don’t hurt your finger.
Tape Measure Tips & Tricks
Now that we’ve talked about the basics, here are a few things you might not know about your tape measure:
The hooked tab is adjustable
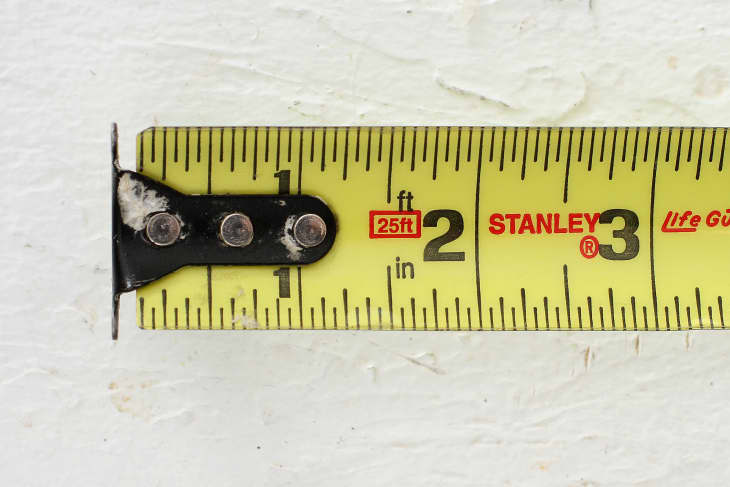
The hooked tab (metal end piece) is purposely loose and moves in and out ever so slightly, by design. When you hook it behind an object, then pull out the tape to measure, the tape separates from the tab a bit. That movement, and resulting gap, compensates for the 1/16″ thickness of the metal hook, so it’s included in your total. When the end tab is pushed against an object (say when you’re measuring inside a drawer or window), the little gap disappears, so you still get a perfect measurement.
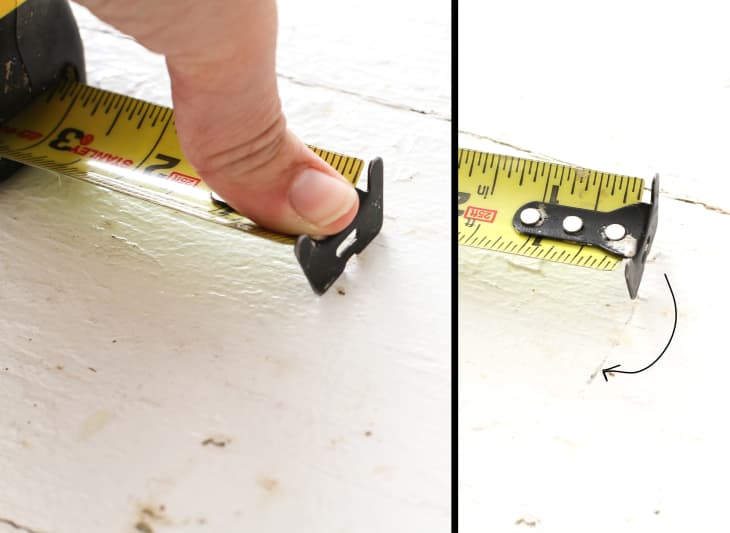
There’s a handy nail notch
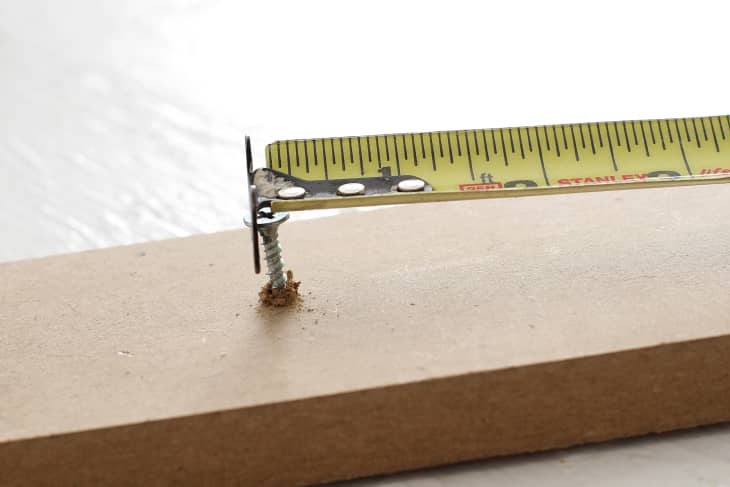
This extremely useful small hole is found in the front of the the hook tab. If you’re working solo, but need an extra hand to hang onto the end of the measuring tape, just hook the tab onto a nail or screw, then use it for leverage when you pull.
You can also use the nail notch to draw a circle. Just hook the tab on the nail or screw and extend the tape to the desired length. Keep the pencil at that specific length as you swing the tape around in a circular motion, all while keeping the tab hooked to the nail. Check out the videoherefor further instruction.
You can measure from above
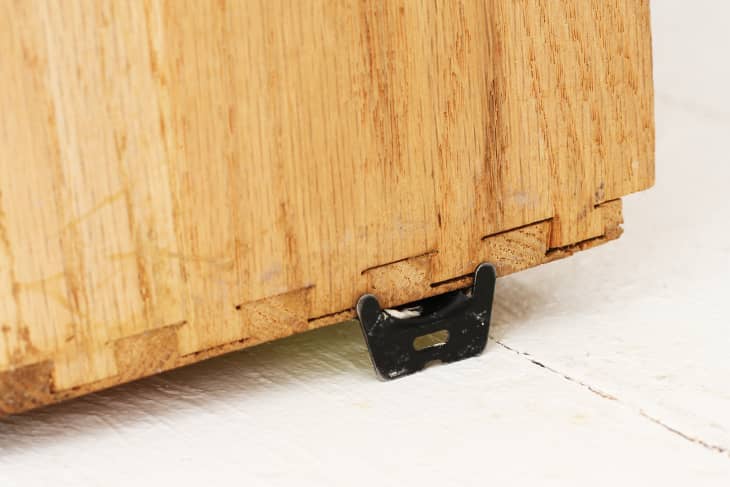
This feature is found on most larger measuring tapes. Look for two vertical ‘ears’ extending upward off the end of the hook tab. These are designed so that you have the option to hook your tape from the bottom, so you’re still able to take measurements from above, without having to duck underneath and read them upside down.
Note the marked housing length
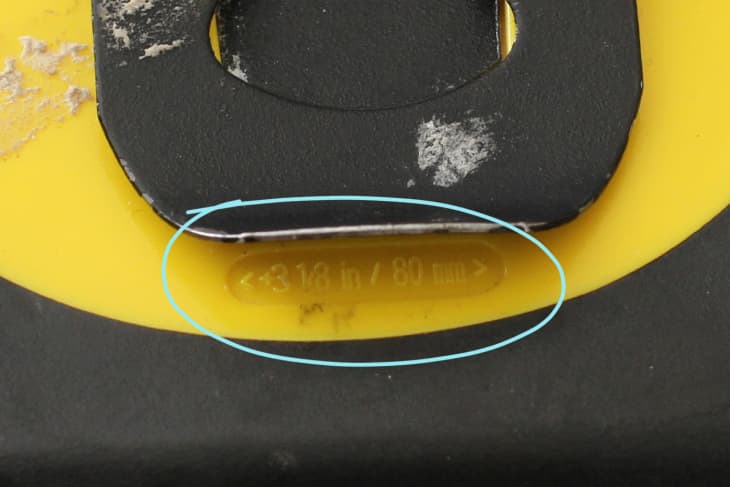
If you’re like me, you’ve probably always measured interiors/windows the same way; by hooking the tape on one end, and bending the tape at the corner of the other end, then estimating the approximate length. This may work out once in a while, but there is actually a much more accurate way, using the numbers marked on the housing. If you look at the back of your tape measure, just beneath the belt clip, you should see the measurement of your actual tape measure housing, which comes in handy when measuring the interior of something like a drawer or window:
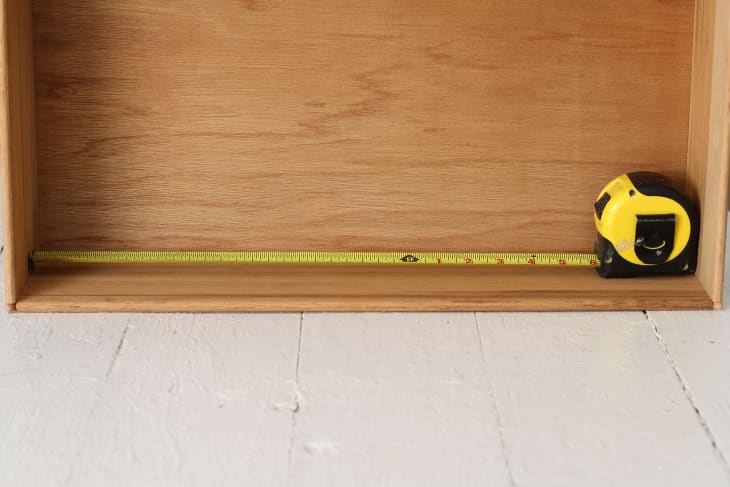
To measure the interior, start by pressing the tab so that it’s flush against one end, then stretch the tape across the length of the item, butting up the back end of the housing to the wall. Jot down the measurement, then add that number to the number on the back of your housing for the exact interior measurement. In the photo above, our tape read 17 7/8″. The tape measure housing is 3 1/8″, so when you add the two measurements, you come up with 21″ for the interior of this drawer.
There’s a serrated scribing tool
Need to mark a line but your pencil is out of reach? Apply pressure to the hooked tab and scratch it back and forth across the surface a few times to leave a mark.
There’s a handy mark for studs

You may have never noticed this feature on your tape measure before, and that’s okay, because more than likely, you’ll never need to use it. But this feature is specifically for contractors. Diamonds are spaced out just over 19″ on a tape, which is the standard spacing for trusses when building roofs.
It helps you draw straight lines
画一条直线,钩选项卡到一个品系ght ledge of a board or a table ledge and extend the tape. Place the pencil at the desired length and let the tape housing come up to meet the pencil, then lock the tape in place. Holding the pencil and tape housing with one hand, place your other hand on the hooked tab, dragging the tape measure, pencil, and hooked tab down the straight ledge together. It sounds involved, but once you do it you’ll find it’s a quick and easy way to mark lines that you don’t need to be 100 percent accurate.