

Before and After: A $500 Redo Lets This Pink 1950s Bathroom’s Original Features Shine
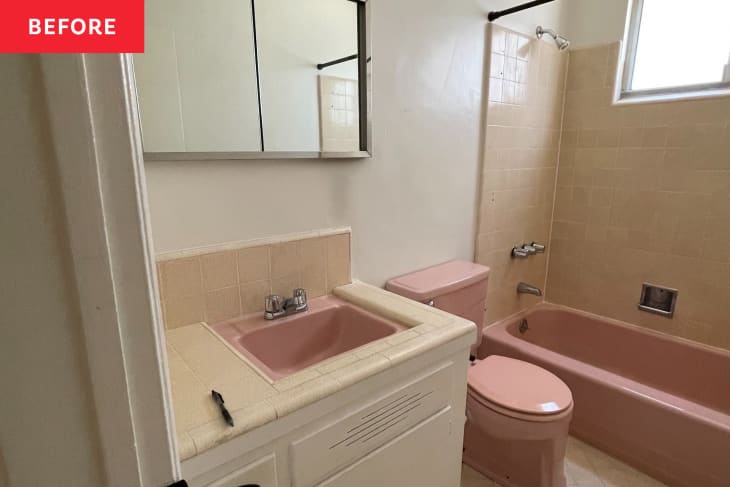

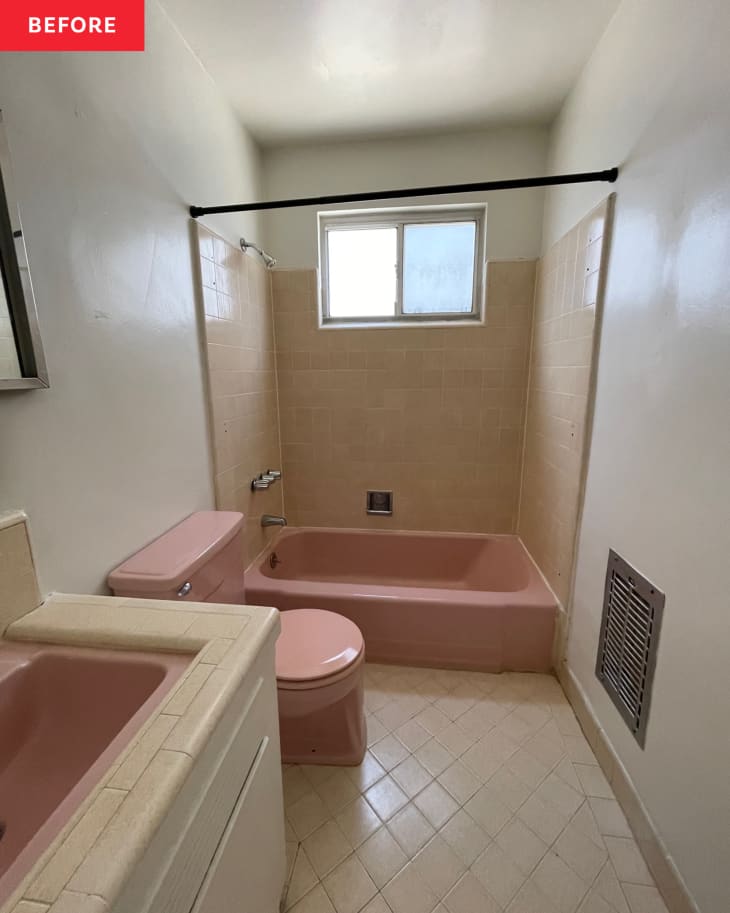
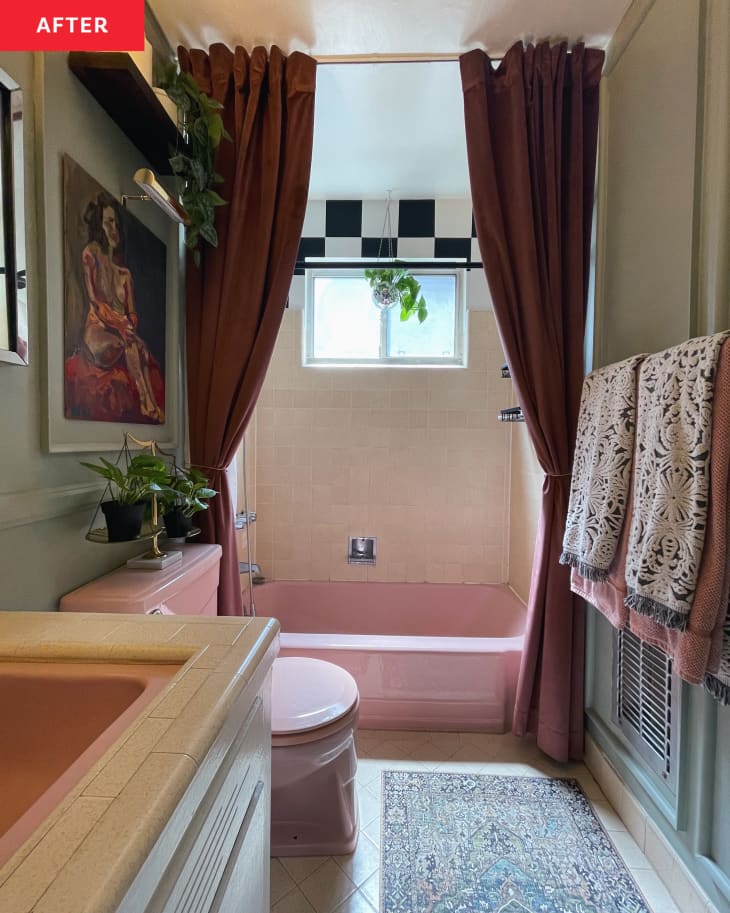
If thepastel pink fixtures in the bathroomweren’t enough to suggest that Daniella Caruso’s apartment was built in the 1950s, there’s definitive proof: “The toilet is time-stamped under the tank lid — June 10, 1958,” Daniella says.
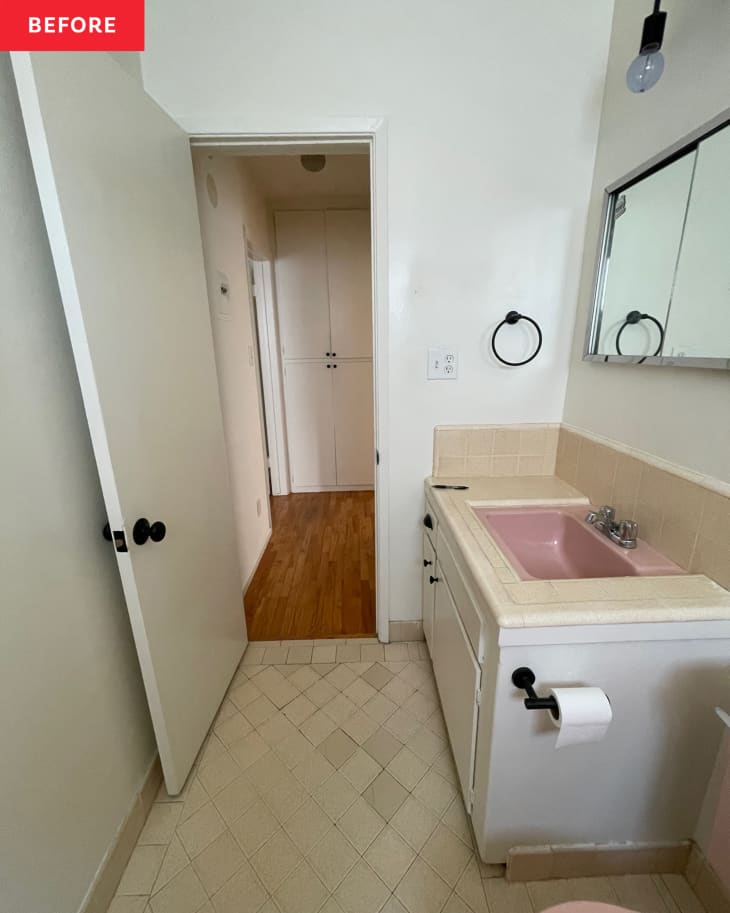
“The previous tenant changed out the hardware on the cabinets and the light fixture above the vanity, but other than that, everything is original from when the building was built in the 1950s,” she adds. The bathroom may have gotten a fresh coat of paint in the past few years also, Daniella says, but even still, much of the space needed a refresh.
“The pink toilet, tub, and sink gave it so much character,” Daniella says. “I just felt like the space had so much potential, and I really wanted to highlight the pink and choose colors and textures that would complement that color scheme and the time period.”
Her biggest priority was finding a paint that would make the pink feel more contemporary, and she landed on a somewhat unexpected (but totally smart!) pick: a gray-green. And best yet? She didn’t even have to buy it. “I got so many samples but ended up going with a Backdrop paint that I had left over from a different project,” Daniella says. “It ended up being perfect.” (That perfect color, by the way, isBackdrop’s Road to Todos Santos.)
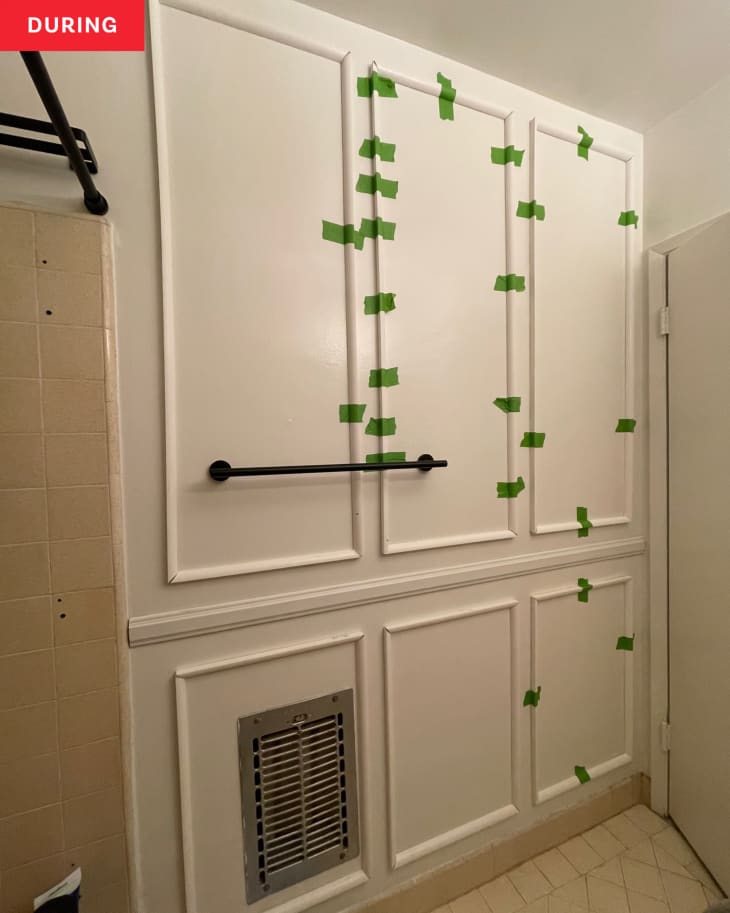
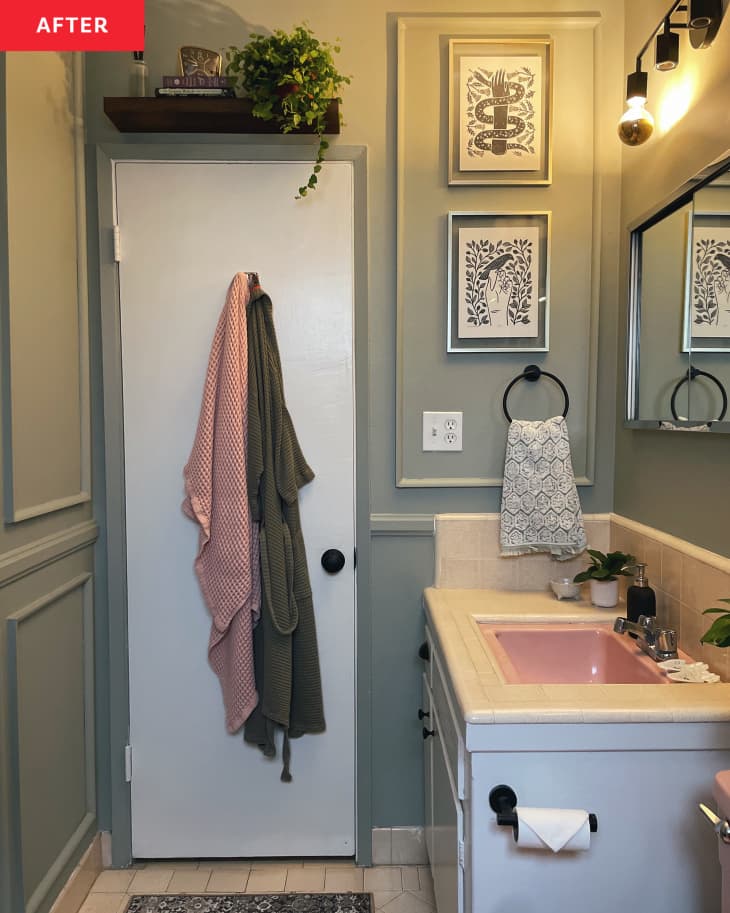
But before painting, Daniella added a bit of character to the once-plain walls with some picture frame molding that she DIYed. “I had a picture of what it could look like in my head and made a Pinterest board for reference. Measuring it out was probably the most crucial step.”
Daniella outlined the measurements with pencil on the walls first so she would have had a general idea of placement spacing. She got the wood strips from Home Depot, cut the wood by hand with a hand saw, and adhered it to the wall using construction adhesive. A couple of factors added to the difficulty here: Her 65-year-old apartment’s walls weren’t perfectly straight, and she didn’t have any power tools.
“我买了最便宜的工具可能但我不会’t necessarily recommend that,” Daniella says. “A circular saw and a nail gun would’ve saved me a lot of time and effort.”
“I’m a DIY noob, so all of this was pretty new to me,” Daniella says. “It wasn’t until recently that I really learned how to use a drill.” But she has picked up some knowledge in her reno process. Her recommendation for an extra-polished look when adding DIY molding to walls is to make sure to fill in the gaps between the molding and the wall with caulk. “That was tedious, but was oddly my favorite part of the whole process — very meditative in practice and gratifying to see the end result,” Daniella says. “It made everything look clean and cohesive.”
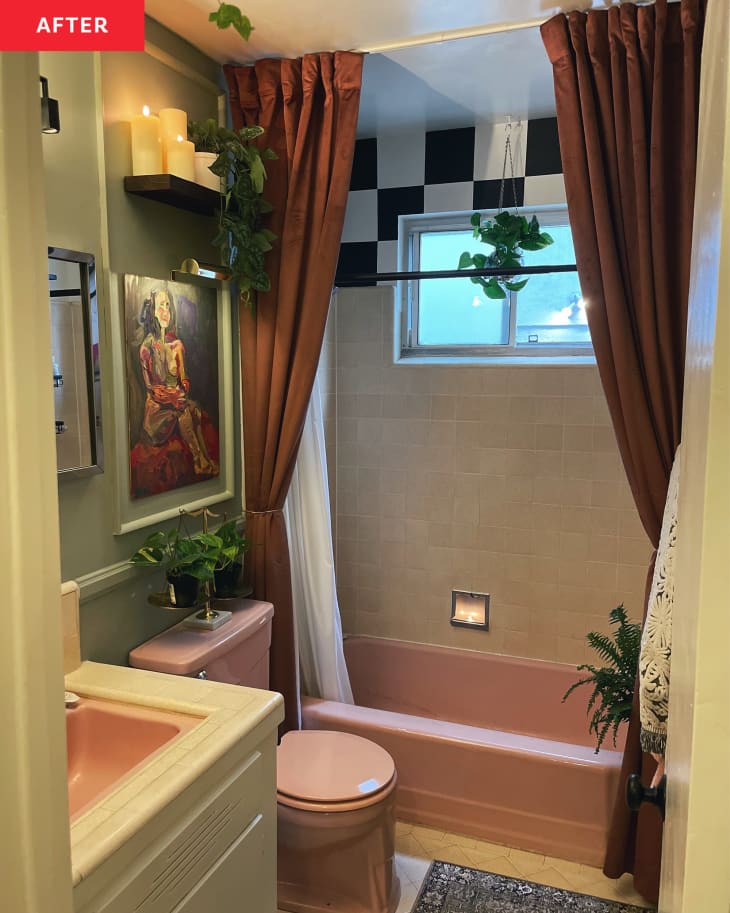
For the walls above the tan shower tile, Daniella skipped the wood molding and instead created a graphic black-and-white checkerboard pattern with paint.

Drilling the holes for the shower curtain rod was also a DIY first for Daniella. Instead of hanging just one curtain, she used two — one on each side of the tub — for a dramatic look. Hanging the curtains from the ceiling makes it appear taller. “It feels so much more warm and cozy than it did before, and I love the romance and the drama of the space now,” Daniella says. “I feel like it really leans into that glamorous old Hollywood vibe.”
Other small-space wins in Daniella’s revamped bathroom include the shelf above the doorway and the mirrored medicine cabinet (even though in Daniella’s dreams she might swap that out). “If I owned this property instead of rented, I would also invest in some new tile,” she says. “The square beige tile is cracked in a lot of places and is generally just dated. I’d also re-caulk everything (the tub primarily) so it looked crisp and clean.”
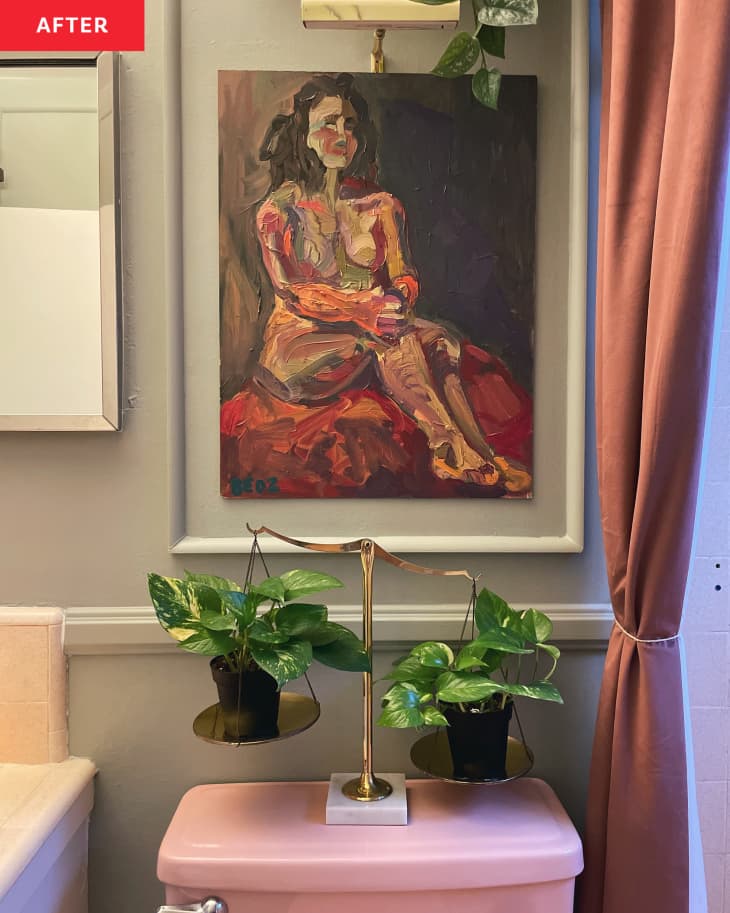
Daniella’s best advice for a budget-friendly redo is to consider what materials you can save on (she used black and white paint instead of stick-on tile above her shower, for example) and to shop secondhand at thrift stores, antique malls, and estate sales. In fact, her most prized possession in the bathroom, the artwork, was thrifted, as was the scale-turned-planter above the toilet.
“I found the painting above the toilet at an antique mall in Denver called the Brass Armadillo and immediately knew I needed it for the bathroom,” she says. It’s the perfect finishing touch for her pink-meets-mint-green-meets-red, retro-meets-trendy bathroom.
Inspired?Submit your own project here.