

Prep Time: Preparing Your Space to Plant


For more content like this follow
You’vesited your space, you’vepicked your plants, you’veshopped for tools… and now it’s go time! You’re (almost) ready to start planting! No matter what type of garden you’re growing, prepping your space is all about prepping the soil properly.
By now, you should know thetype of soilyour plants like and what kind of nutrients they need in order to thrive. You should also have a plan in place for watering them, so double-check the proximity and pressure of your faucets (if irrigating with a hose, sprinkler, or drip system) and make any adjustments as needed to the placement of your garden.

Preparing Your Container Garden for Planting
Step 1: Choose your containers.
Whether you buy all new containers or repurpose objects from around the house, choose pots of varying heights and diameters for visual interest. Make sure they are wide and deep enough to hold your plants, taking into account the final size of the plants when they’re fully grown.
If your containers don’t have drainage holes, drill a few into the bottom before you start filling them.
Step 2: Amend your potting mix if needed.
Most commercial potting mixes come with slow-release fertilizers in their formulations, but if yours doesn’t, mix in an all-purpose fertilizer or a layer of compost at the rate suggested by the manufacturer. Smooth the potting mix with a trowel.
第三步:填写你的容器密封。
If you’re working with large containers, move them to their permanent place in the garden, so as not to lug around a heavy pot later.
Fill each container with an all-purpose potting mix, leaving a couple of inches from the top. If you’re growing specialty plants, such as succulents or citrus, use a potting mix made specifically for their needs.
Step 4: Water the potting mix thoroughly before you plant.
Wet the potting mix and make sure the water runs out of the drainage holes properly. Don’t just lightly wet the surface — you want the potting mix to be moist several inches down, where the roots will be growing.
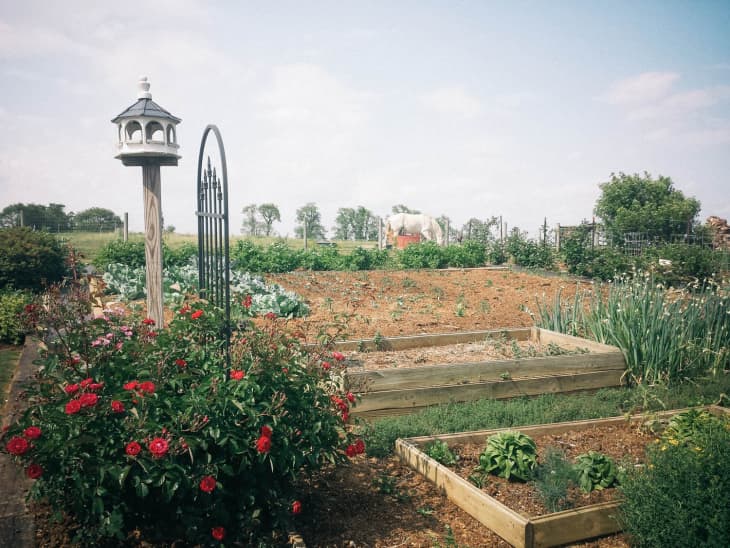
Assembling Your Raised Bed Garden
Step 1: Evaluate your site.
的first question with a raised bed is whether to install it over your existing topsoil, or to loosen the topsoil first before you place your bed.
For most plants, it’s perfectly fine to install a raised bed without preparing the site it sits on. Your plants will depend on the soil inside the bed, so the walls should be at least 8 inches high. But if you want to ensure the roots have plenty of room to grow (especially if you have rocky soil or plan to grow root vegetables), dig up the topsoil to the depth of your spade to loosen it. Remove any rocks, weeds, or debris from the site, rake it over, and tamp it smooth.
Step 2: Install your raised bed.
Assemble the raised bed, position it over your site, and anchor the corners. Dig or add soil where needed to level the bed.
Lay down several sheets of newspaper inside the bed, over the topsoil, to smother any weed seeds that may try to sprout.
If your yard has an issue with burrowing pests, deter them by adding a layer of hardware cloth before you pour in the soil. Make sure it lays flat against the ground and curves up the sides of the bed by a few inches. Staple the hardware cloth to the bed to secure it, and trim any excess material with wire cutters.
Step 3: Fill your bed with garden soil.
A raised bed is essentially a large container, so use an appropriate soil to fill it. Your best bet is a bagged soil labeled as “garden soil” or “raised bed soil,” since it’s designed to drain properly while still retaining moisture.
To fill multiple beds, you can buy soil in bulk from a landscape or soil supplier, but be sure it’s formulated for raised beds. Most suppliers offer a range of soil blends for different landscaping needs, from standard-quality topsoil to higher-quality compost/soil mixes. Be sure to choose a soil that works with your plants.
Pour the soil into your bed, leaving a couple of inches at the top for mulch once you’ve put in your plants.
Step 4: Amend your soil if needed.
Add nutrients to your soil by mixing in an all-purpose fertilizer at the rate suggested by the manufacturer, or spreading a few inches of compost on top and turning it into the soil with a spade or fork. Then, rake the soil over to smooth it out.
Step 5: Water the soil thoroughly before you plant.
Wet the soil and make sure it drains properly. You don’t want water pooling on the surface for too long, or water running right through the soil without moistening it. If either scenario happens, amend your soil with compost to improve its texture. Allow the soil to settle overnight before planting, adding more soil and compost the next day if needed.
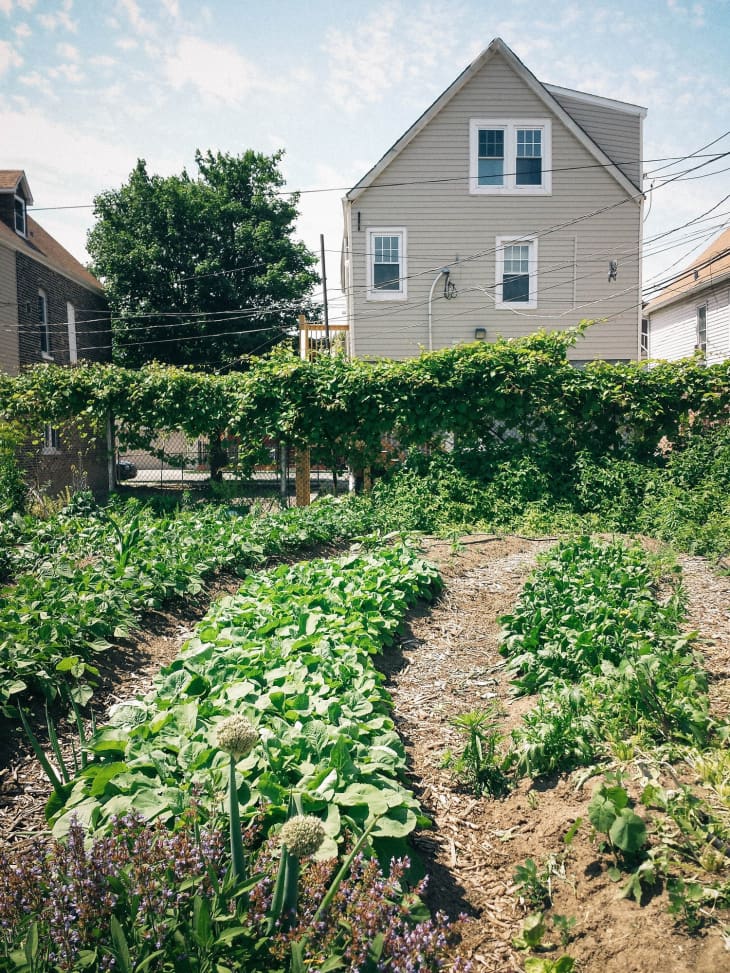
Getting Your In-Ground Garden Ready
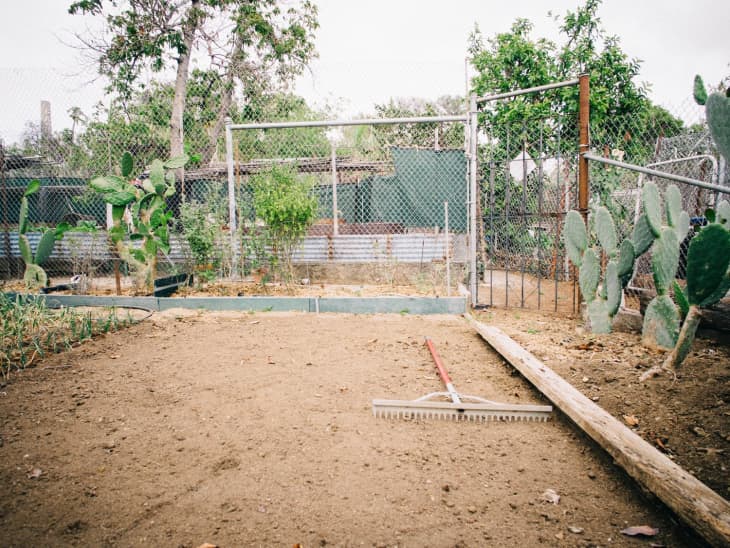
Step 1: Make sure your planting area is clean and clear.
Clear the topsoil of any existing vegetation, roots, rocks, and debris. When weeding, be sure to pull up the taproots as well as any runners so they don’t regrow once you’ve put in your plants.
Step 2: Mix your native soil with an equal amount of garden soil or compost.
Depending on the type of soil you have, mix it with an appropriate garden soil following the manufacturer’s instructions. Bagged soils are usually formulated with specific ingredients that help improve heavy or sandy soil. If you aren’t sure what you need, an all-purpose garden soil or well-aged compost should do the trick.
Dig the garden soil or compost in to a depth of at least 12 inches, or as deep as you can go to encourage healthy root systems. Continue to remove large rocks and other obstructions as you find them.
Step 3: Amend the soil.
If you haven’t already added compost, spread a layer of at least 3 inches on top and turn it into the soil with a spade or fork. Alternatively, you can amend the soil with an all-purpose fertilizer at the rate suggested by the manufacturer. Once amended, rake the soil until it’s level and smooth.
Step 4: Water the soil thoroughly before you plant.
Saturate the soil and ensure it drains properly. You want the soil to be moist, but not waterlogged, at least 3 to 4 inches below the surface before you plant. Allow the soil to rest and settle for several days. If it still seems too loose or too compacted, add more garden soil or compost as needed.
Expert Tip: Before you head to the store, calculate your soil needs.Bagged soil is measured in cubic feet, while bulk soil is measured in cubic yards. You can figure out the volume of your planting bed by using anonline topsoil calculator, or asking the soil supplier how much soil you need based on your bed measurements.