

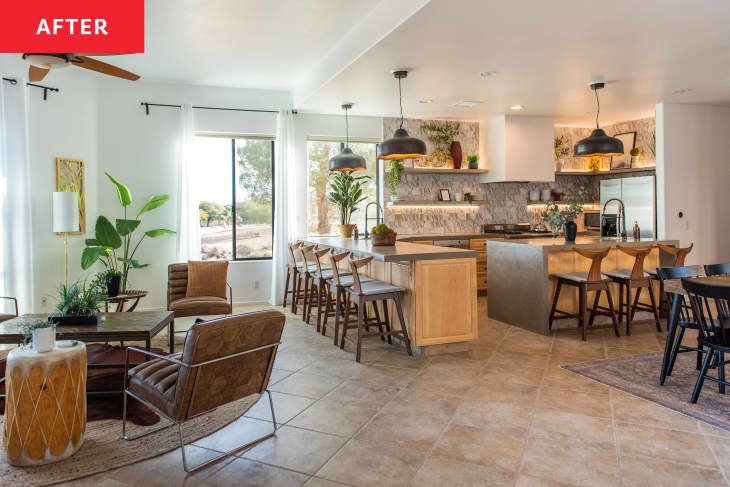
Before and After: An Early 2000s Kitchen Keeps Its Cabinets in This $2,000 Scandi-Industrial Revamp
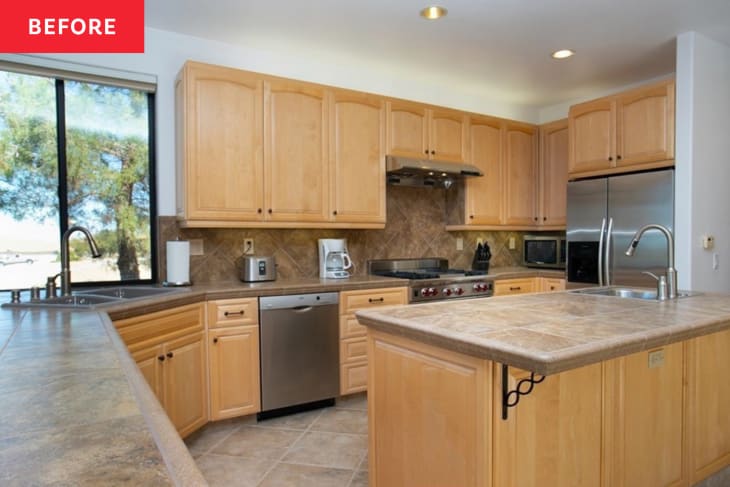

Orange-y wooden cabinets from the ’90s and 2000s might have a bit of a dated look to them, but they can be worth keeping just for the sheer quality of the wood. Throw a little paint on them, and they’ll be perfectly on-trend today, when dark gray, navy, anddeep green paint colorsreign.
For more content like this follow
One of the great things about Jessica Preteroti (@nestbyjess) and her husband, Matt’s, kitchen redo is that they worked the old cabinets into the new design (cabinetry lemonade out of lemons, if you will).
“The kitchen had great bones,” Jessica says. “The cabinets were in fantastic condition, and there was a ton of storage, but nothing about the space really ‘wowed.’ It was an awesome space to cook: large spans of countertop, two ovens, and a Wolf range, but the visuals left a little to be desired.”
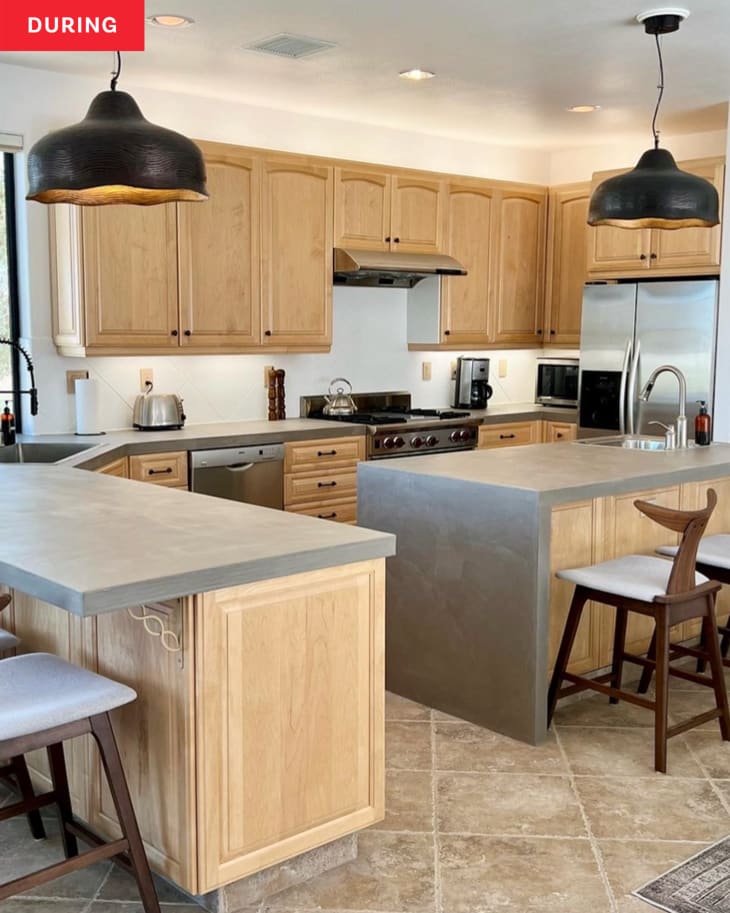
Jessica did a “soft renovation” first, where she painted the brown backsplash white, addedbold black pendantswhere the recessed lights were, and replaced the tile counters from 2003 with DIY concrete ones with a waterfall edge. “All of those changes cost around $500, and it was a great jumping off point for the the later, larger renovations,” Jessica says. “Eventually, I’d love to swap out my DIY countertops for a stone or quartz, but for the time being, I couldn’t beat the $200 price point of the concrete.”
Next up were the nitty-gritty renovations, which cost about $1,500 more. Over the course of 10 (!!!) days, Jessica and Matt demo-ed the upper cabinets and backsplash; purchased and installed the floating shelves; covered those with concrete; built, painted, and sealed the new range hood; purchased and installed their new backsplash tile, and added under-shelf lighting. “I was on a strict timeline, so I scheduled out the renovation to the hour,” Jessica says.
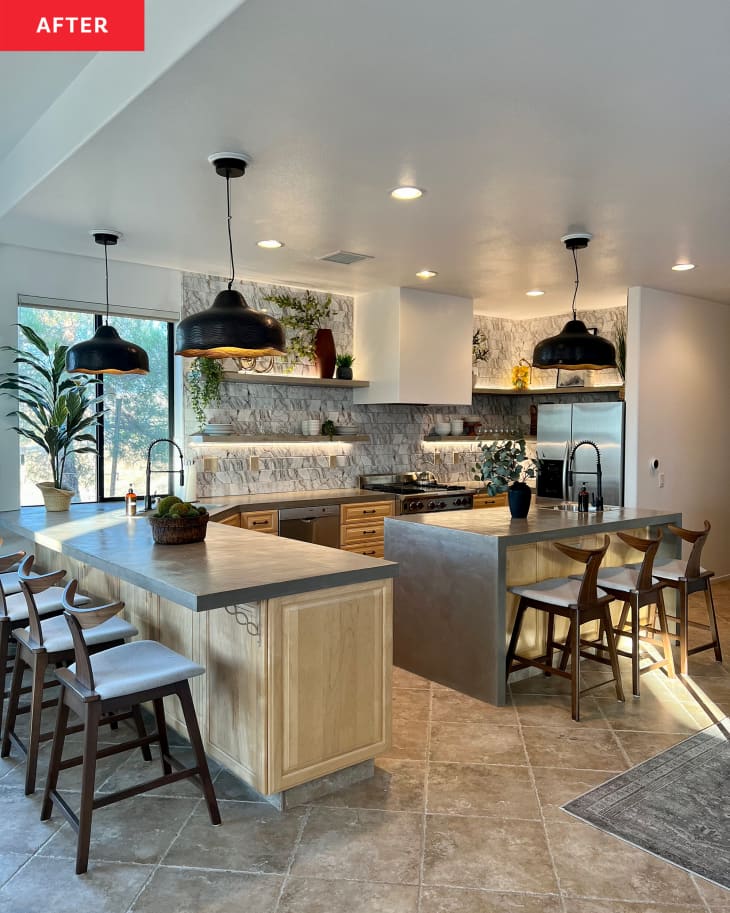
The most difficult part of the journey, she recalls, was the backsplash. From choosing the right tile to actually installing it, “I was at the mercy of whatever was in stock at the tile shops and knew I needed to have an open mind,” Jessica says. “I ended up going with a marble look ceramic tile with gold leaf veining. It was waaay bolder than I had envisioned.”
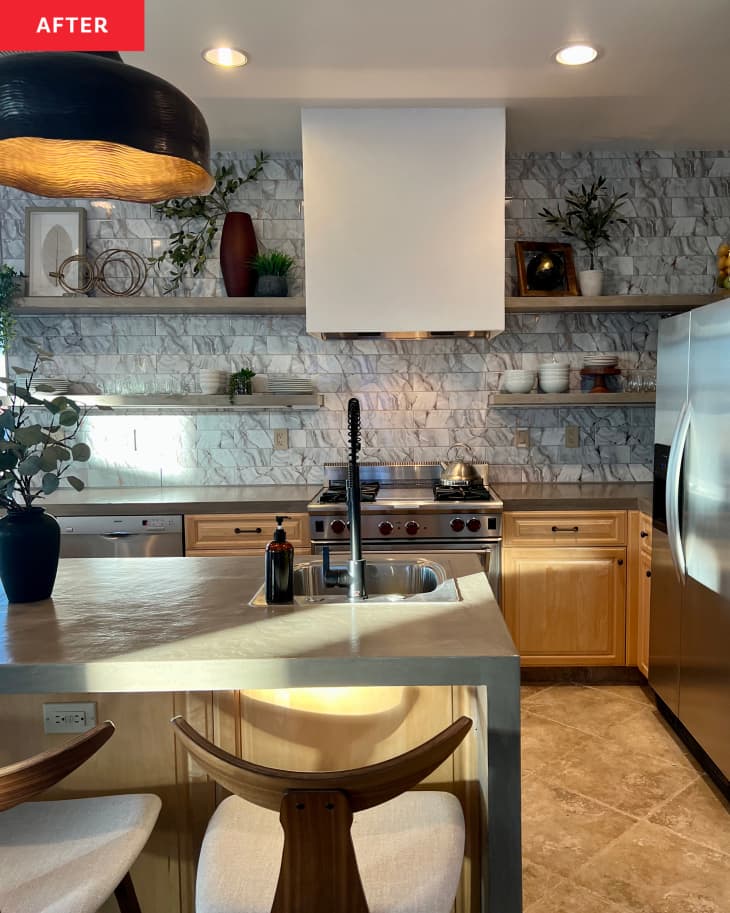
Now, thefunky, swirly tileis one of her favorite parts of the room. “The metallic gold veining is really special,” she says. “It reflects as you walk through the space, so the wall almost feels alive in a sense.” Her kitchen reno advice is this: “When choosing materials, go in with an open mind, and find something that speaks to you — it will not only make the space feel really special to you, but it also makes the long, hard days of DIYing more fun!
And speaking of long, hard days of DIYs, the one part of her kitchen redo that wasnotJessica’s favorite was grouting the sparkly backsplash. “For the life of me, I couldn’t get the grout to stick to my grout float or the tile, so I tried a mortar bag, which was another fail, and ultimately, I ended up grouting the entire space with my hands. Desperate times equal desperate measures!”
One part of the process that was easier than expected, though, was installing the new hood. “I made and installed the entire thing with a box cutter and a drill, and it cost less than $75 in materials,” Jessica says. “I’m proud that I was able to create such a change on such a tight budget and timeline!”
适用于整个空间,不仅仅是upper-cabinet region! The new Scandi-meets-industrial kitchen is a far cry from its beige beginnings. “The space now feels like me, and I’m thrilled that I could pull it off!” Jessica says.
Inspired?Submit your own project here.