

Before and After: A Kid’s Bedroom Goes from Green Stripes to a Galaxy Far, Far Away

Designing a kids’ bedroomis a constant balancing act, with the primary question being the following: How can you best honor your young one’s interests which might change the very next day (think: a sudden Bluey to Barbie pivot), without breaking the bank and switching up furniture and decor constantly?
DIYer Stephanie Hofer (@2thesunnyside) tackled this exact question while redoing her 9-year-old son, Aiden’s, bedroom in theOne Room Challenge. Aiden’s latest passion? Star Wars.
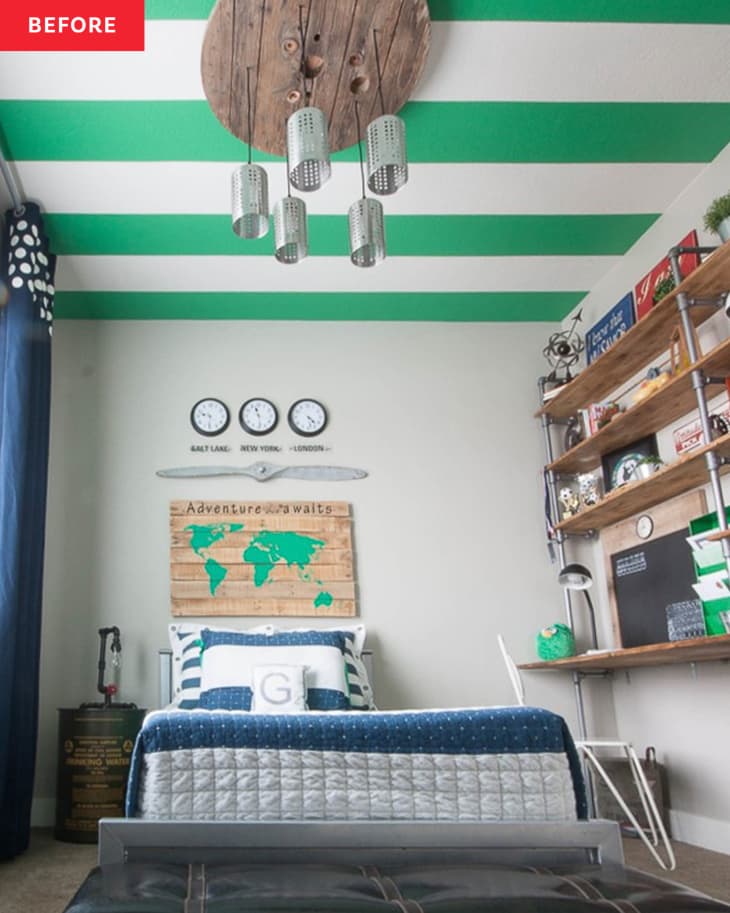
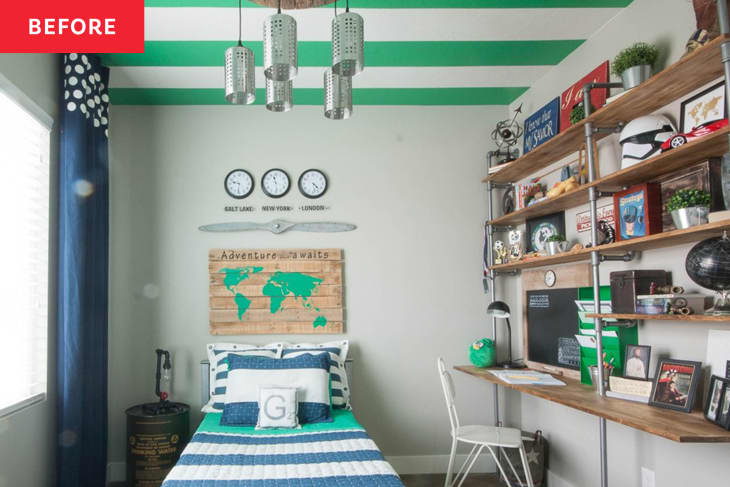
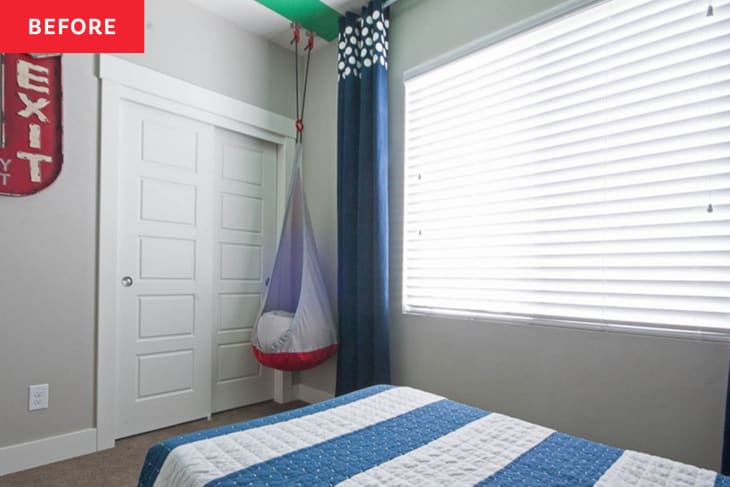
The project started after Aiden swapped bedrooms with his teenage brother. The room before was designed with an older kid in mind, and had a kelly green striped ceiling as well as industrial elements like a locker bed, a wood and pipe desk and shelves, and a light fixture made out of a wooden spool.
Although Aiden liked his brother’s desk and shelves, he was set on modeling his new room after a galaxy far, far away (i.e., more in line with his Star Wars interests). So alongside her partner and her own mom, Stephanie set out to make Aiden’s intergalactic dream a reality — with some sensible, down-to-earth caveats.
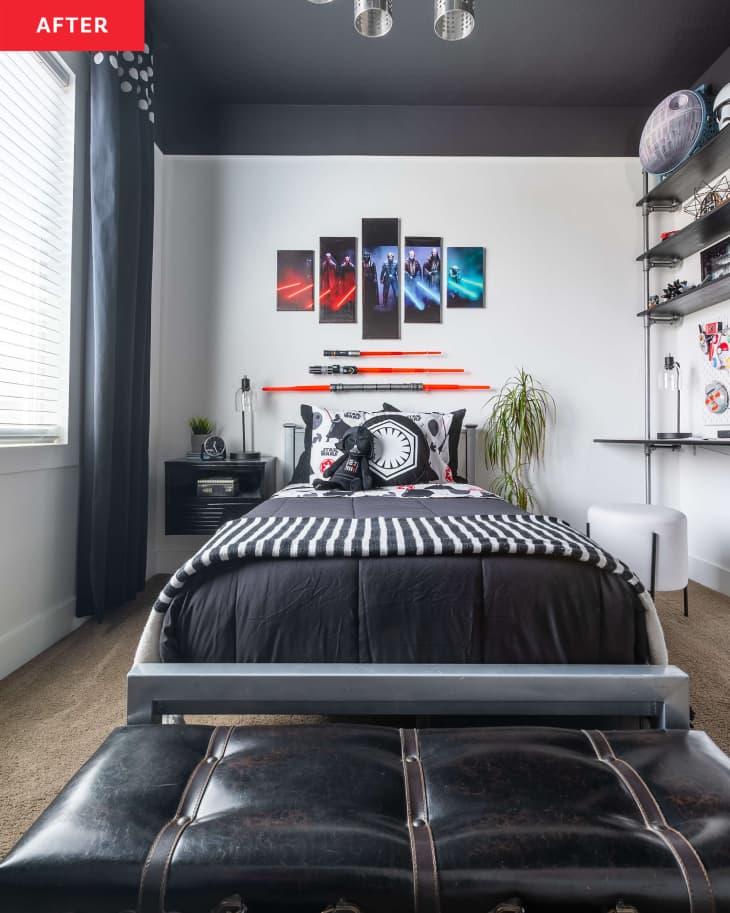
“我想创建一个卧室,将增长him,” Stephanie says. “So the shell of this room is neutral, and the Star Wars theme is only brought into the room with accessories.”
To start, Stephanie and her fellow DIYers usedSherwin-Williams’ Pure WhiteandCaviarto create a modern (and versatile!) black-and-white color palette that, as she points out, also embodies the dark side and light side of the Star Wars lore. They also made over the same curtains that were already there by dyeing them black.
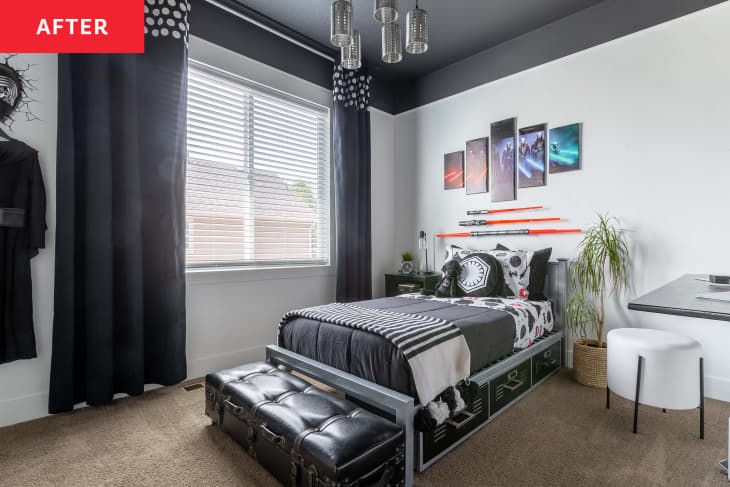
Rather than searching for brand-new furniture, Stephanie and her family chose to modify what they already had by sanding the wood of the pipe desk and the shelves and staining it in deep black (Minwax’s “True Black”). Although the process took days, Stephanie says taking the pieces apart and staining them saved major money — it cost just $32, as compared to the hundreds or even thousands of dollars it would take to buy all new.
Stephanie’s personal favorite part of the process was turning a traditional nightstand that her mom had in storage into a sleek floating one. The DIYers didn’t even have to use the Force to make it hover! Instead, they removed the nightstand’s traditional molding, cut it down, added a geometric design on the drawer, painted it glossy black, and mounted it on the wall using a French cleat.
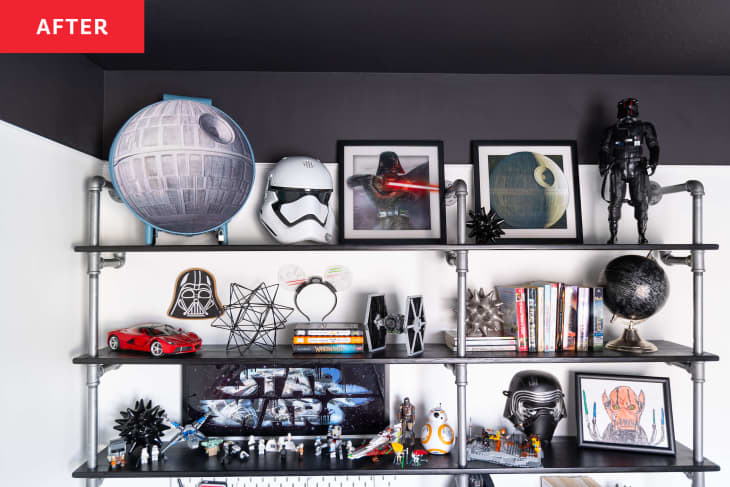
Apart from displaying Star Wars memorabilia like hislightsaber collectionandcanvas art, incorporating colorful, glow-y lighting was a major priority for Aiden. Because Stephanie didn’t want the light feature to create cord clutter, she opted to partially shield the lights with cove molding and the cord with a curtain panel. The effect hides unsightly wires but still lets the light shine out.
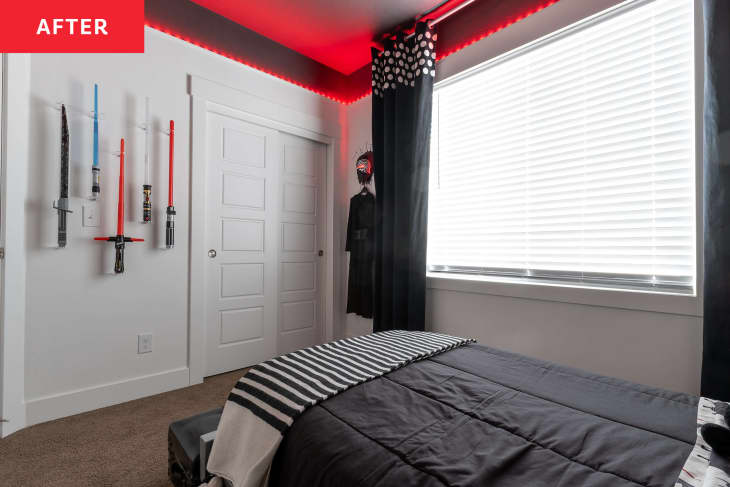
“The LED lights sync to his Bluetooth and can change colors and dance to the beat of the music, which Aiden loves,” Stephanie says.
Thanks to this series of DIYs, Stephanie was able to create Aiden’s dream Star Wars room for $497, sticking to the $500 budget she and her family had dedicated to this renovation. And as Aiden grows older, the space is infinitely adaptable. “I love the fact that the room can easily be changed into his new obsession in a year by just swapping out the bedding and wall decor,” Stephanie says.
As for her words of advice for parents looking to give their kids their own room makeovers?
“Let your creative juices flow and try something new,” Stephanie says. “Often, there are mistakes, but that gives us an opportunity to find a way to fix it and learn. There’s definitely joy in this journey!” A true Jedi mindset if we’ve ever heard one.
This project was completed for theSpring 2023 One Room Challenge, in partnership with Apartment Therapy. See even more of theOne Room Challenge before and afters here.
Inspired?Submit your own project here.