

Before and After: A $300 Kitchen Upgrade Thanks to a Lenient Landlord

This rental kitchen was covered top to bottom with fixtures and finishes from the ’60s, ’70s, and ’80s, so one brave tenant finally gathered the courage to ask for permission to make improvements. Amazingly (and smartly), the landlord said yes and the DIYing wason.
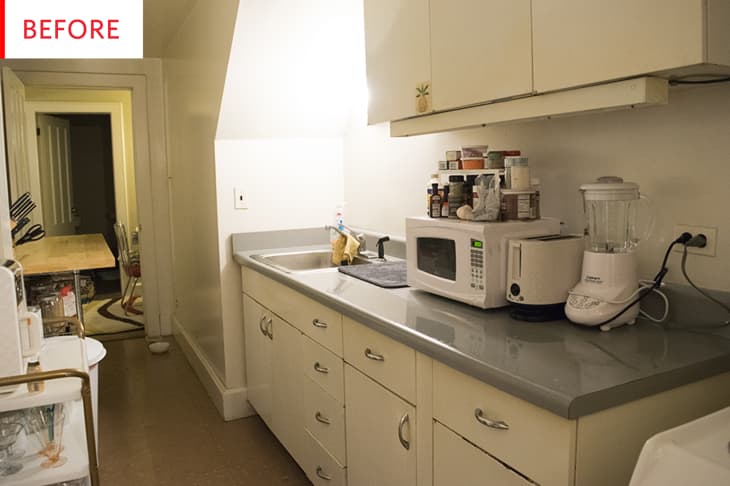
While the kitchen looks pretty nice in the photo before, its resident has the real scoop:
The kitchen in this rental is a galley-style kitchen. Since it’s in the basement of a historic brownstone, I believe it used to be a hallway that lead to the back part of the house. The cabinets are metal from the ’60 or ’70s with rusted out metal handles. The countertop is a weird gray-blue flower pattern.
There is no vent for the stove so over the years, there’s a yellow greasy residue on the walls and the cabinets. (I’m not sure if the previous tenant ever cleaned). I really like the metal cabinets due to how deep they are and tall. They can hold lots of storage which is great in such a small kitchen.
The lighting is horrible in the kitchen. There are two “pot” lights, one above the sink and one above the stove. They are really out dated and the light bulbs emit a very yellow hue. Since these are the only two lights, it leaves a dark space when you first walk into the kitchen like you’re entering a dungeon.
The floor is a typical peel and stick vinyl flooring (but from the ’80s) you expect in most rentals, however it has chunks missing. Sahhhweet.
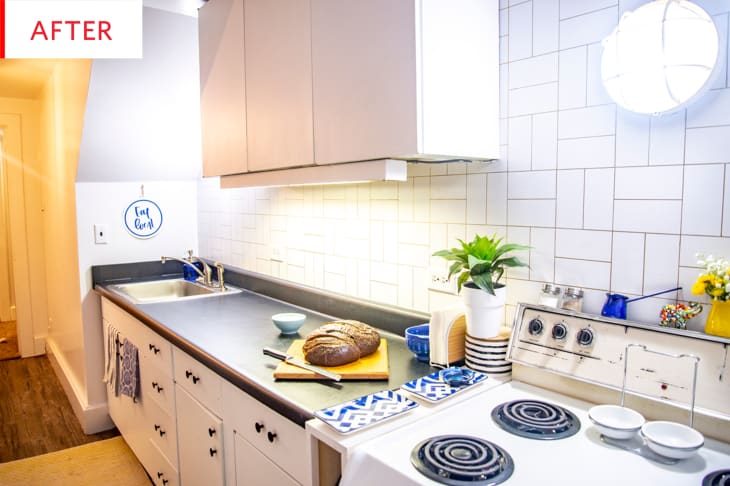
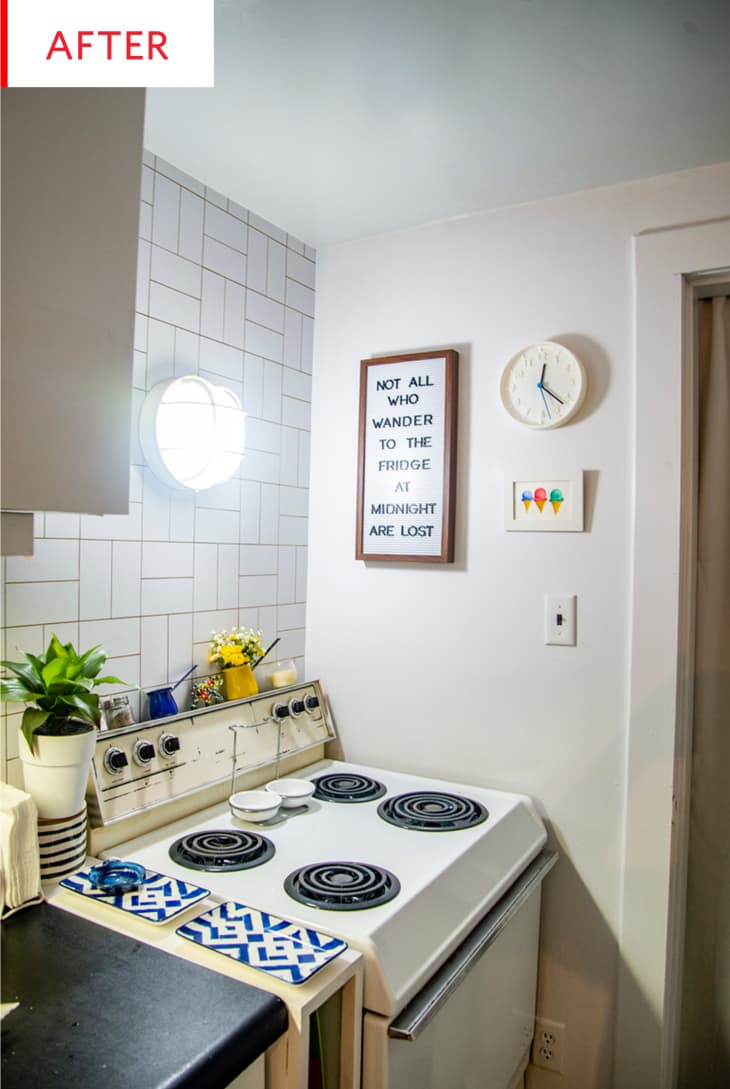
This looks fantastic, but I need to tell you something urgently: That new tile backsplash washand-drawn with a Sharpie. It’s so perfectly done, and eye-catching, yet subtle. The pattern was drawn with a gold paint Sharpie on a fresh coat of paint—no more yellow greasy residue. The counter is now black, which pairs well with the burners and the new knobs; creating a high-contrast black-and-white base also allows the gold “grout” to shine and the colorful accessories to really pop, whereas the old grey-blue added a color to work around without adding any sort of pop.
Rachel Castro ofSnap & Designis responsible for this makeover and is my new rental renovation hero. Here’s a bit about the thought process that led to this kitchen’s fresh look:
I’m a firm believer that you need to feel at home in your rental. Just because you don’t own the property doesn’t mean you can’t put a little money into your space. Sometimes you luck out and you have lenient landlords that let you customize your space (within reason). When I first looked at my basement apartment the first thing I asked was, “Can I paint? White/Light Gray?” Answer: “Yes!” Then, I started thinking of all the ways I can customize the space that fits my style.

Let’s focus on the floor—it’s unfortunate that its damaged because I could see someone working with a classic ’80s floor like this to create a totally fresh look. (If you’ve worked such a trick, please let us know!)
I spent just under $300 on this transformation and I’m quite happy with the results. I started with covering the counter and cabinets and swapping out all the hardware. Then, I installed a new peel-and-stick flooring. Lastly I painted the walls a fresh bright white and hand-painted a tile pattern with Sharpie paint pens.
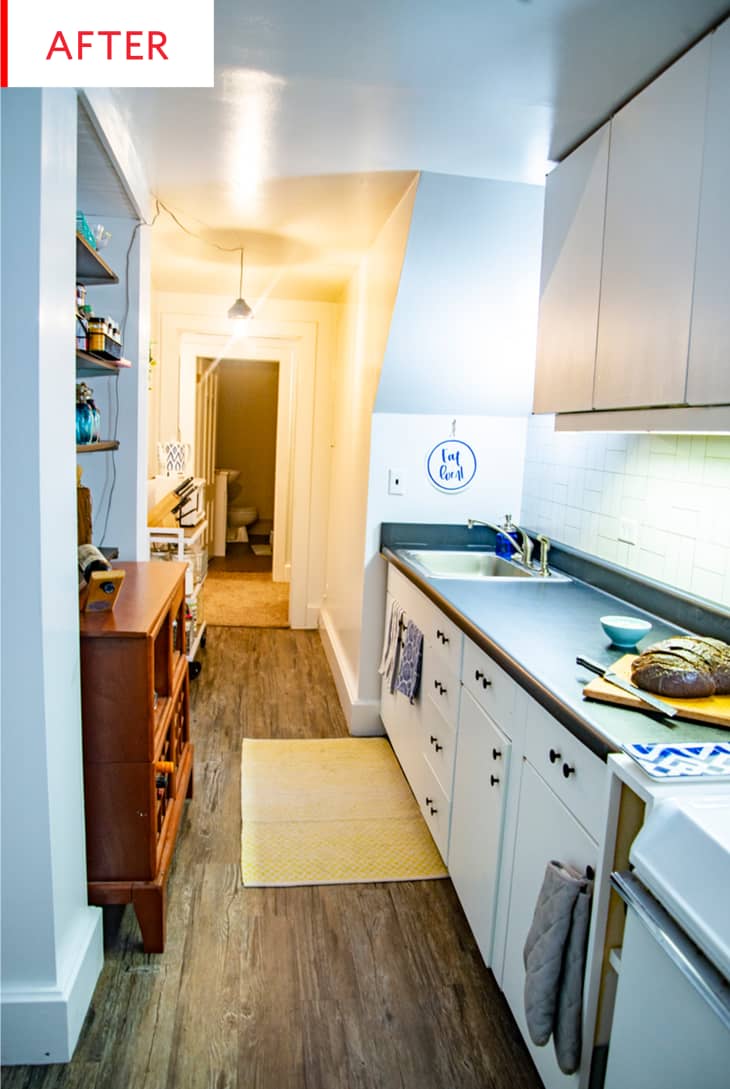
I can’t believe the lovely floor peel-and-stick. It adds warmth and texture to the black-and-white kitchen, and its pattern works so well in the long, narrow space. This photo also gives us a glimpse of all the colorful items on the open shelves on the left. Again, that’s one of the great things about a black-and-white kitchen: all of the fun, colorful accessories become the star of the show, and it’s super easy to totally change the look of the room.
Rachel is rightfully pleased with the how this project turned out:
I love that I want to cook in my kitchen now and that my landlord was super thankful and grateful for the updates I did, that they gave me a deal on a new apartment. **hello future DIYs**
The only thing I would have done differently is to do more sooner. I did this project in phases over a year because I was worried about cost, but it actually was way more affordable than I thought it was going to be.
“I wish I would have done it sooner” could be the official motto of the Before & Afters, so take heed: Improve your home as soon as you are able!
Rachel shares her smart rental-renovation advice:
Don’t hesitate to ask! The worst that can happen is they say no. I knew my landlord was fine with me painting the walls but putting in a new floor? That took me six months living here to build up a trust before I was comfortable to ask. And they didn’t bat an eye—just said yeah go ahead!
Thank you, Rachel Castro ofSnap & Design!