

Before and After: A $200 Kitchen Project Does Open Shelving the Renter-Friendly Way

There are tons of great renter-friendly kitchen ideas inApartment Therapy’s Before and Aftersthat’ll prove that no kitchen is completely helpless. Even if you can’t do any permanent renovating, you can always adda bar cart,upgrade an appliance, play withcontact paper on different surfaces,swap out some hardware, orswap out entire cabinet doorsto create upscale open shelving.
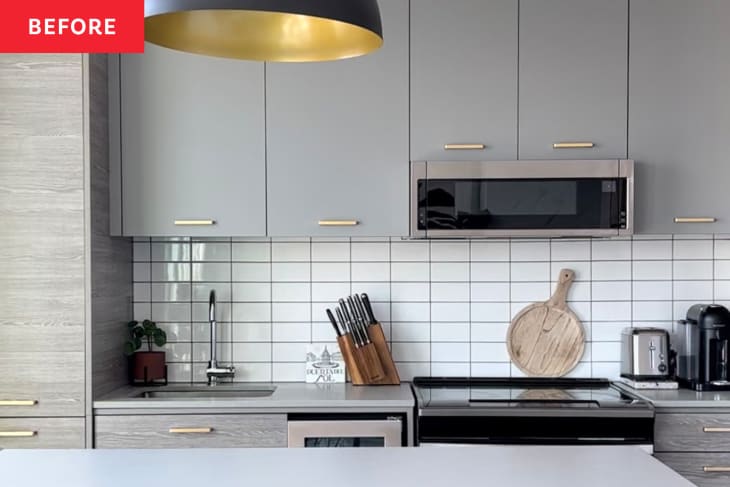
Rental-friendly was the name of the game for Alicja Dworzak (@mynorfolknest) when it came to modifying her 2022 new-build kitchen. The space was already quite beautiful, but Alicja wanted to add a little more visual interest — and she needed to do it without making any permanent changes.
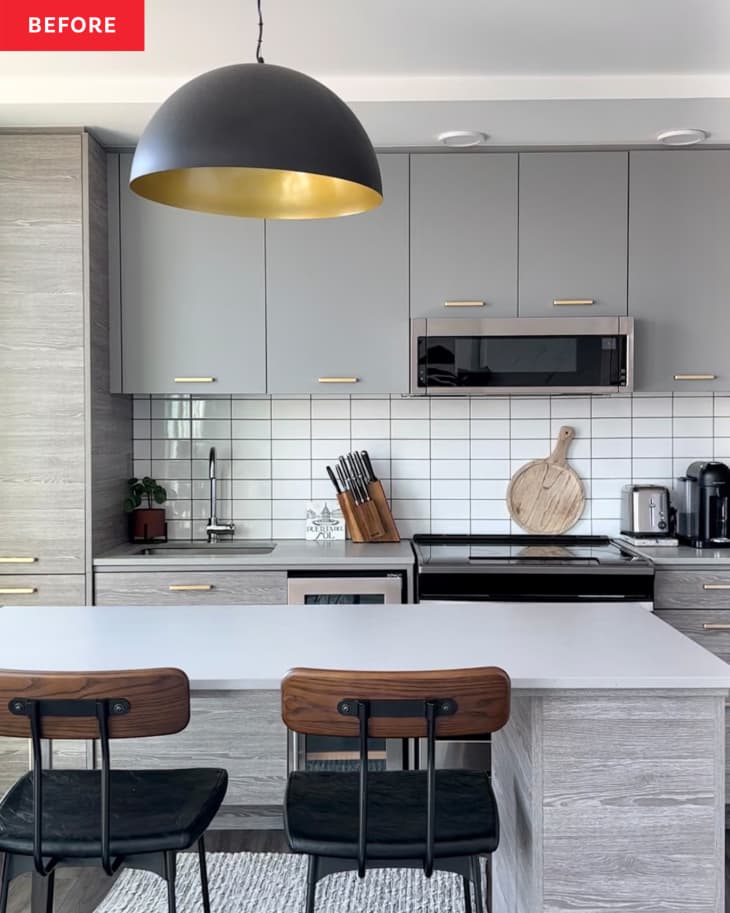
“Our kitchen in our apartment was nice and new, but it didn’t have much character, and I wasn’t in love with the gray-colored cabinets,” she says. “I always really wanted to add open shelving, but didn’t think it was possible because we were renting.”
Using plywood, 1×3 lumber, wood filler, wood glue, sandpaper, nails, natural stain, and peel-and-stick wallpaper (all for a total of about $200), Alicja proved herself wrong, and the results are beautiful. “I would definitely say this DIY was budget-friendly,” she says. “I saved a lot of money in doing this myself.”
Alicja started by measuring the existing shelving and then created chunkier wood shelves in the same dimensions. She made her shelves mostly out of plywood but used her 1x3s on the fronts for a polished-looking finish. It was her first time using her Rotorazer hand saw — “or any saw for that matter,” Alicja says. “It was definitely intimidating and took some practice, but once I made a few cuts and felt more comfortable, it went by quickly and easier than I anticipated.”
She attached the plywood with wood glue, filled all nail holes with wood filler, and sanded all the sides of the shelf. “I was worried there were going to be gaps and imperfections, but after lots of sanding and staining, I was quite happy with how they turned out,” Alicja says.
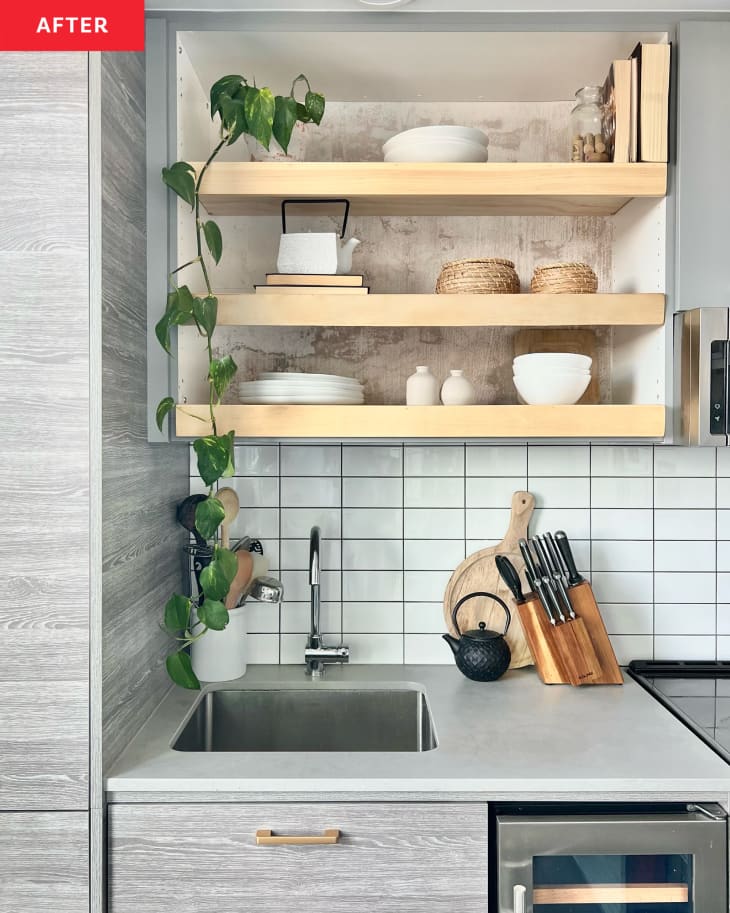
Alicja usedVarathane’s Natural Interior Stainfor a light blonde-ish look, and she repeated the process above for all three shelves. She used the cabinets’ existing shelf support pegs to hold the new shelves in place.“Before I inserted these new shelves, I added wall paper to the back of the cabinet to add more detail to the finished project,” Alicja says. “If I were to do this again, I would definitely add wallpaper to all sides of the existing interior cabinet — not just the back wall as I did. I feel like this would have completed the project better.” The good news is she can always buy another roll of herfaux-concrete Photowall peel-and-stickand add it to the sides later.
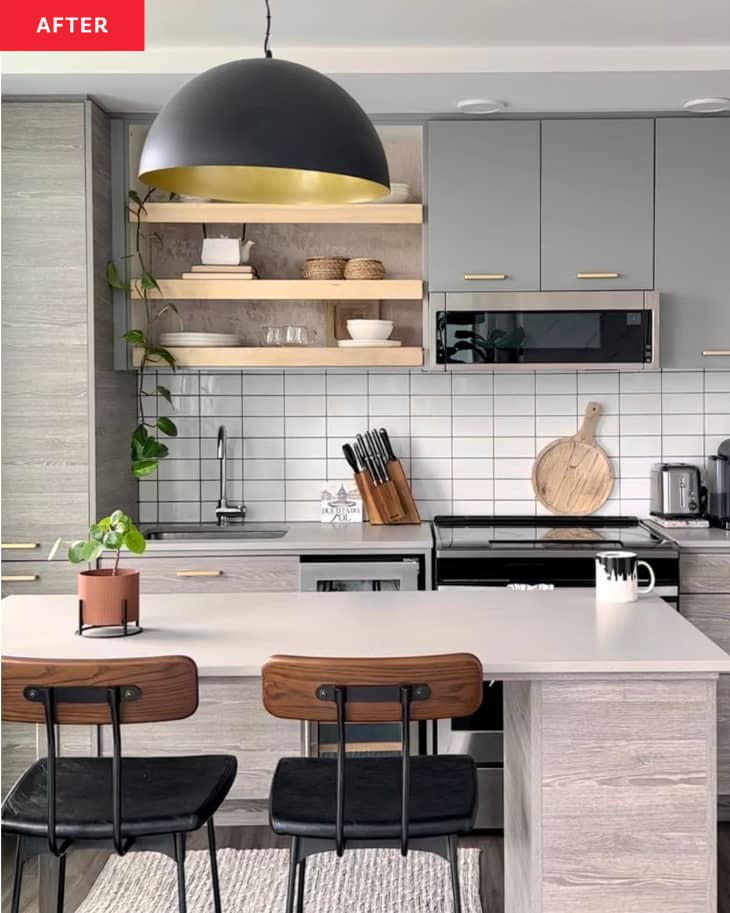
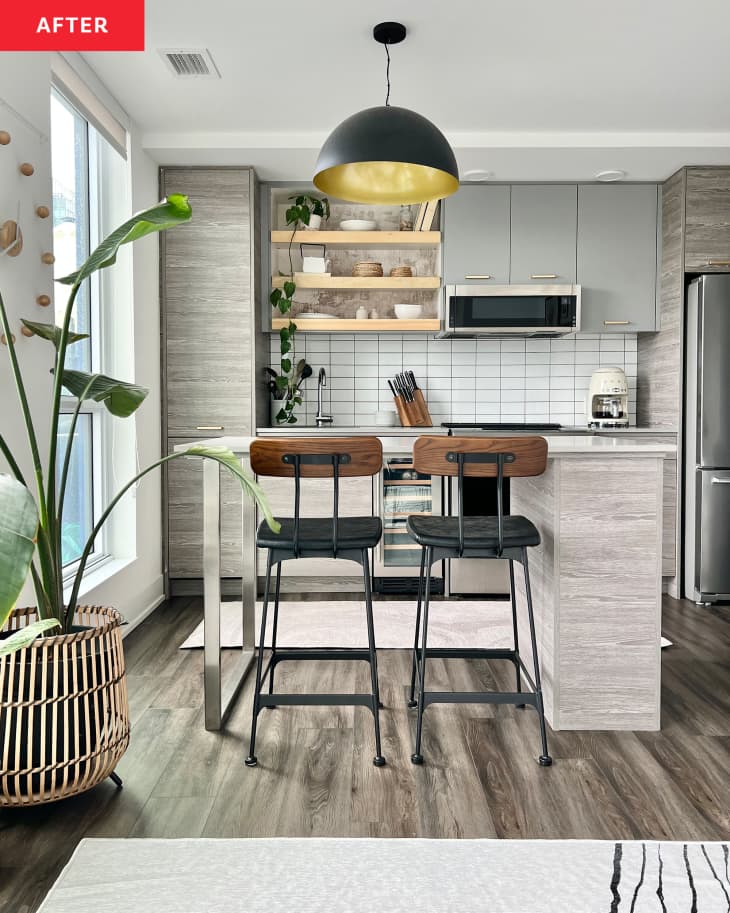
For now, Alicja is pleased with the pop of industrial-chic style she added to her kitchen. “I love how these open shelves add depth and warmth to the previous very gray kitchen,” she says. “It makes the space feel more open.” Plus, it’s fun to play with different decor on the shelves and switch it around depending on the season, she adds.
“My advice to anyone about to start this project or any project is to remember it’s all a learning process,” Alicja says. You’re going to make mistakes, and that’s OK.” (Alicja, too, made a few measurement mistakes and had to do some re-cuts — but in the end, none of those mistakes are visible.) Her advice? “Have fun with it! Next time, it will be easier, and you’ll get more confident in each project you do.”
Inspired?Submit your own project here.